

PiHome Pro and PiHome Kit are smart home assemblies with pre-installed and pre-configured OpenHAB or Home Assistant together with low-voltage hardware based on the model smart house in our How-to section. PiHome Pro is pre-wired and delivered as a ready-to-use assembly in a Hager enclosure. For PiHome Kit, follow the wiring diagram and installation guide to assemble and commission the low-voltage part yourself.
Always entrust the installation and connection of the high-voltage part (not included in Pi-Home) to your electrician.
✅ Plug-and-play: pre-installed OpenHAB or Home Assistant, tuned for quick commissioning
✅ DIY-friendly: clear wiring diagram, labels and step-by-step guide
✅ Scalable: start small and expand to dozens of circuits, sensors and scenes
✅ Brand-independent: gradually integrate your favourite devices (IoT, PV, EV)
✅ Safe by design: you handle the logic, your electrician handles the safety
Choose your implementation path
Pick the approach that suits your skills and available time:
Fully DIY – buy the modules, follow the guide and customise everything yourself.
PiHome Kit – ready components for the model configuration with a pre-installed RPi; assembly and wiring is up to you.
PiHome Pro – custom-built, fully pre-wired and tested low-voltage enclosure.
PiHome demo
PiHome Pro
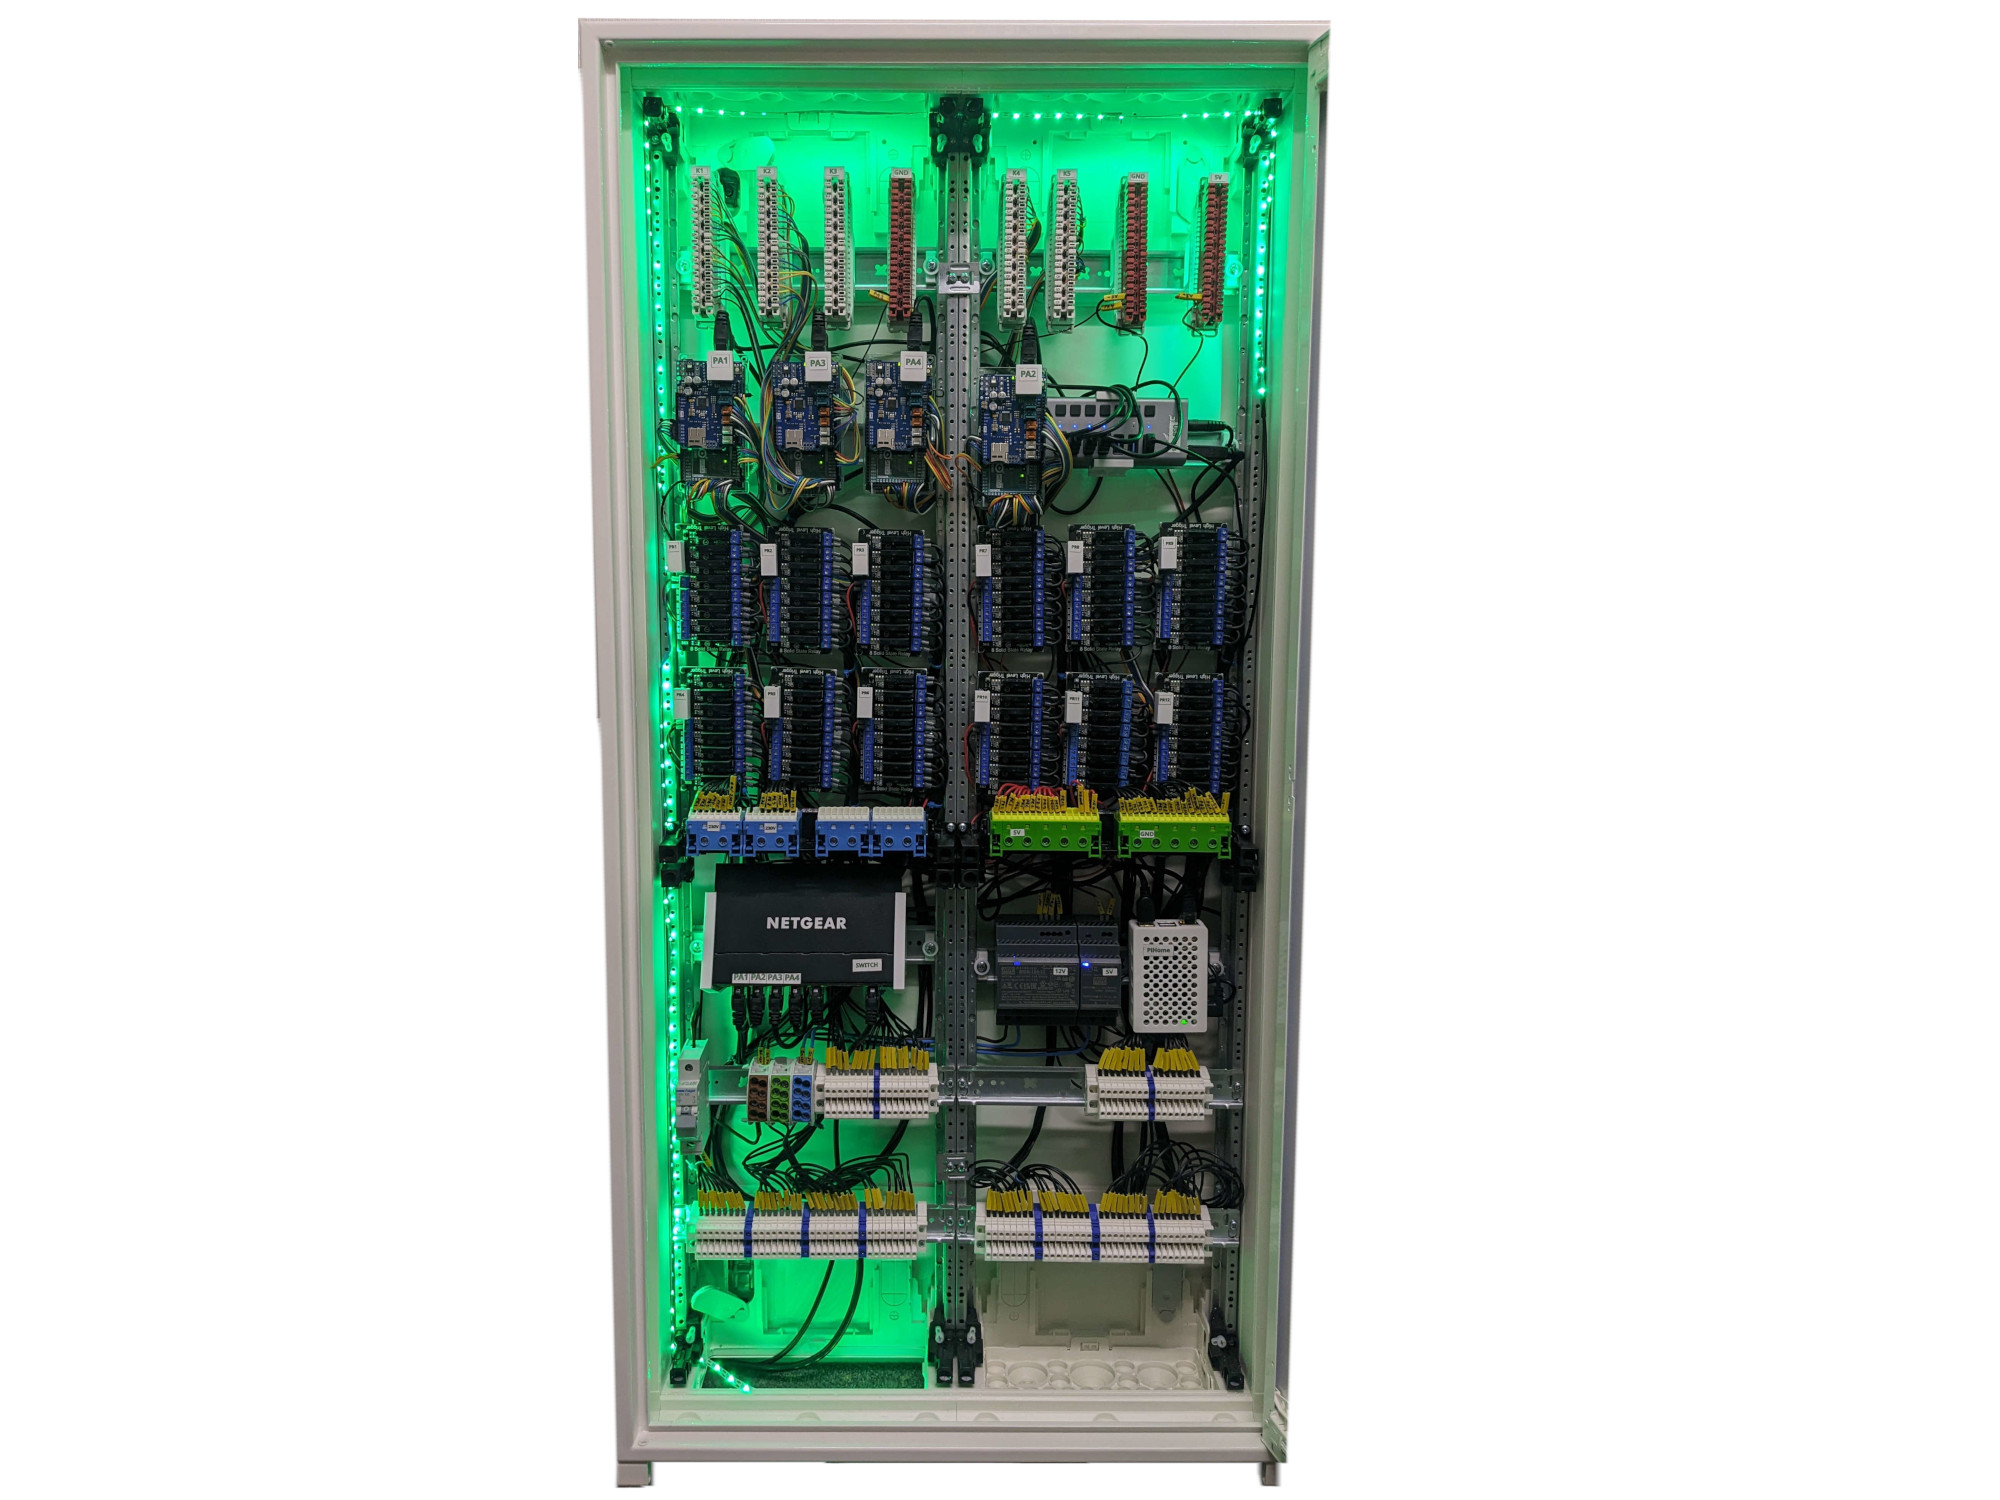
PiHome Pro
Preparation
For a smooth installation and long-term reliability, we recommend the following:
Structured cabling in a star topology
- Star topology for both high and low voltage, where all controlled devices/circuits terminate at the enclosures.
- Lighting: each independently controlled light or group on its own cable (e.g. NYM-J 3×1.5 per applicable standard) to the high-voltage enclosure.
- Sockets: group several outlets into one controlled circuit, each circuit on its own cable (e.g. NYM-J 3×2.5 per applicable standard) to the high-voltage enclosure.
- Blinds/shutters: each motor on its own cable (e.g. NYM-J 5×1.5 per applicable standard) to the high-voltage enclosure.
- Heating: electric – each zone on its own cable to the high-voltage enclosure; hydronic – each valve to the low-voltage enclosure.
- Exterior: Christmas lights, facade lighting, sauna, pool – each controlled circuit on its own cable per project to the high-voltage enclosure.
- Buttons: dedicated UTP (or preferably FTP) CAT5e or higher. One UTP supports up to 7 buttons; plan for approx. 4 and leave spare pairs – cables run to the low-voltage enclosure.
- Sensors: dedicated UTP/FTP CAT5e+ for temperature, humidity, PIR, CO₂. Two to three sensors can share one cable; plan for spare capacity – cables run to the low-voltage enclosure.
Tip: If you miss something, wireless relays and sensors can help — but cables are the foundation: more reliable, safer and often cheaper in the long run.
Enclosure
➡️ For DIY or the starter kit, prepare a low-voltage enclosure sized according to the building — at least 1200 × 800 × 300 mm (H × W × D). (PiHome Pro includes the enclosure.)
➡️ This size typically covers ~100 controlled circuits, 50 sensors and 50 buttons.
➡️ In the high-voltage enclosure, use an installation relay for each controlled 230 V AC output. We currently recommend the Hager ERC125S relay. Include them in the electrical design and allow sufficient DIN rail space.
Skills
💡 No programming, development or Linux knowledge required.
💡 We offer consulting and training for installation, configuration, day-to-day use and initial commissioning.
💡 If you are a tech enthusiast who can use a smartphone or wire up a light fitting, you can handle this. The skills you gain will come in handy for future projects too (e.g. solar, irrigation, greenhouse, sauna, etc.).
What else do you need for PiHome Pro?
PiHome Pro is a complete low-voltage assembly. You will still need to add inputs (physical buttons). For a building the size of our model house, you will also need:
Buttons
40× buttons – any standard single, double or quadruple 230 V buttons, e.g. from Berker.
Relays (outputs) for the model house (in addition to standard electrical installation)
- 29× relays for lighting
- 22× relays for socket circuits
- 10× relays for electric underfloor heating
- 26× relays for blinds/shutters
* We recommend the Hager ERC125S relay (silent, energy-efficient at 0.8 W and with manual override in an emergency).
Indicative budget for a building the size of the model house
| Item | Price (incl. VAT) | |
| Low voltage | ||
| PiHome Kit for DIY in model house configuration – configure here | ~ € 2 500 | |
| or | ||
| PiHome Pro turnkey solution in model house configuration, including enclosure. More information here. | ~ € 5 000 | |
| Buttons – standard 230 V buttons as used in conventional installations (price varies by design/brand) | standard market price | |
| High voltage | ||
| Electrical installation in star topology – approximately 20% more than a conventional installation | standard market price | |
| Hager ERC125S installation relays** for the model house (87 pcs) for switching individual circuits | ~ € 2 000 |
* Buttons require only a UTP cable.
** Relay selection depends on enclosure location (noise requirements). Cheaper alternatives exist (EATON Z-230, Finder). Consult your electrician — there are several suitable options.