

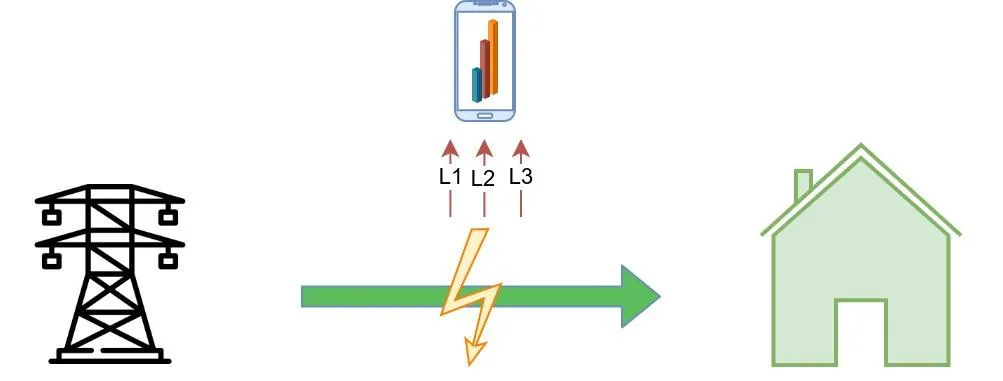
In this post, we will show how to measure real-time consumption by phases in a family house. Various commercial devices can be used; unfortunately, we did not find any native MQTT devices. In our case, we opted for the Aeotec Home Energy Meter Gen5 due to the existing Z-Wave network.
Why is it useful to measure consumption by phases?
Unfortunately, this solution is a result of the incompetence of distribution companies, which should have already provided this measurement as part of their responsibilities and offered it online to customers as part of their considerable distribution fees. Phase-by-phase measurement clearly shows peaks on individual phases and the symmetry of consumption across phases (which should mainly concern the distributor). In our case, we found that under normal conditions we cannot reach the extreme limits of the 3x25A breaker, and we are paying for this reserved capacity unnecessarily. We could manage with 3x20A or even 3x16A, which could save 69 or 125 CZK per month just on the breaker at today's prices.
A significant benefit of measuring is for planning a PV system. A few months of measurement will help you tailor the inverter capacity, battery, and panels and save as much as possible in operation. Combined with a truly automated home, this allows you to switch on/off and schedule consumption in a family house (heating with electric boiler, heating, delayed washing, drying, dishwashing) depending on conditions.
Hardware
Aeotec Home Energy Meter Gen5
Part 8 - Wireless Standards: Z-Wave
Software
OpenHAB 3
Wiring
According to the manufacturer, the wiring diagram for 3 phases is as follows:
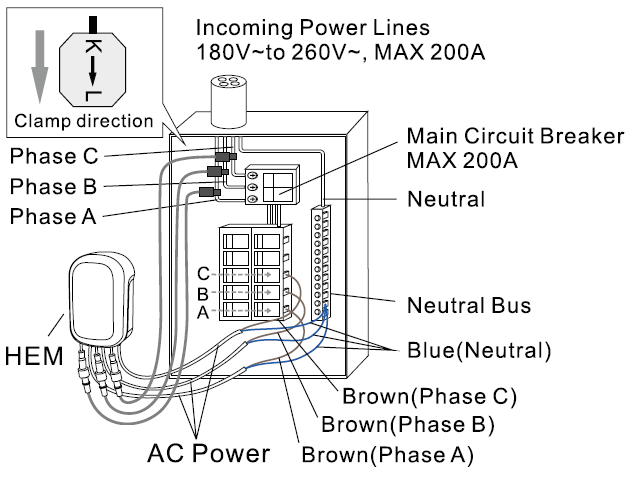
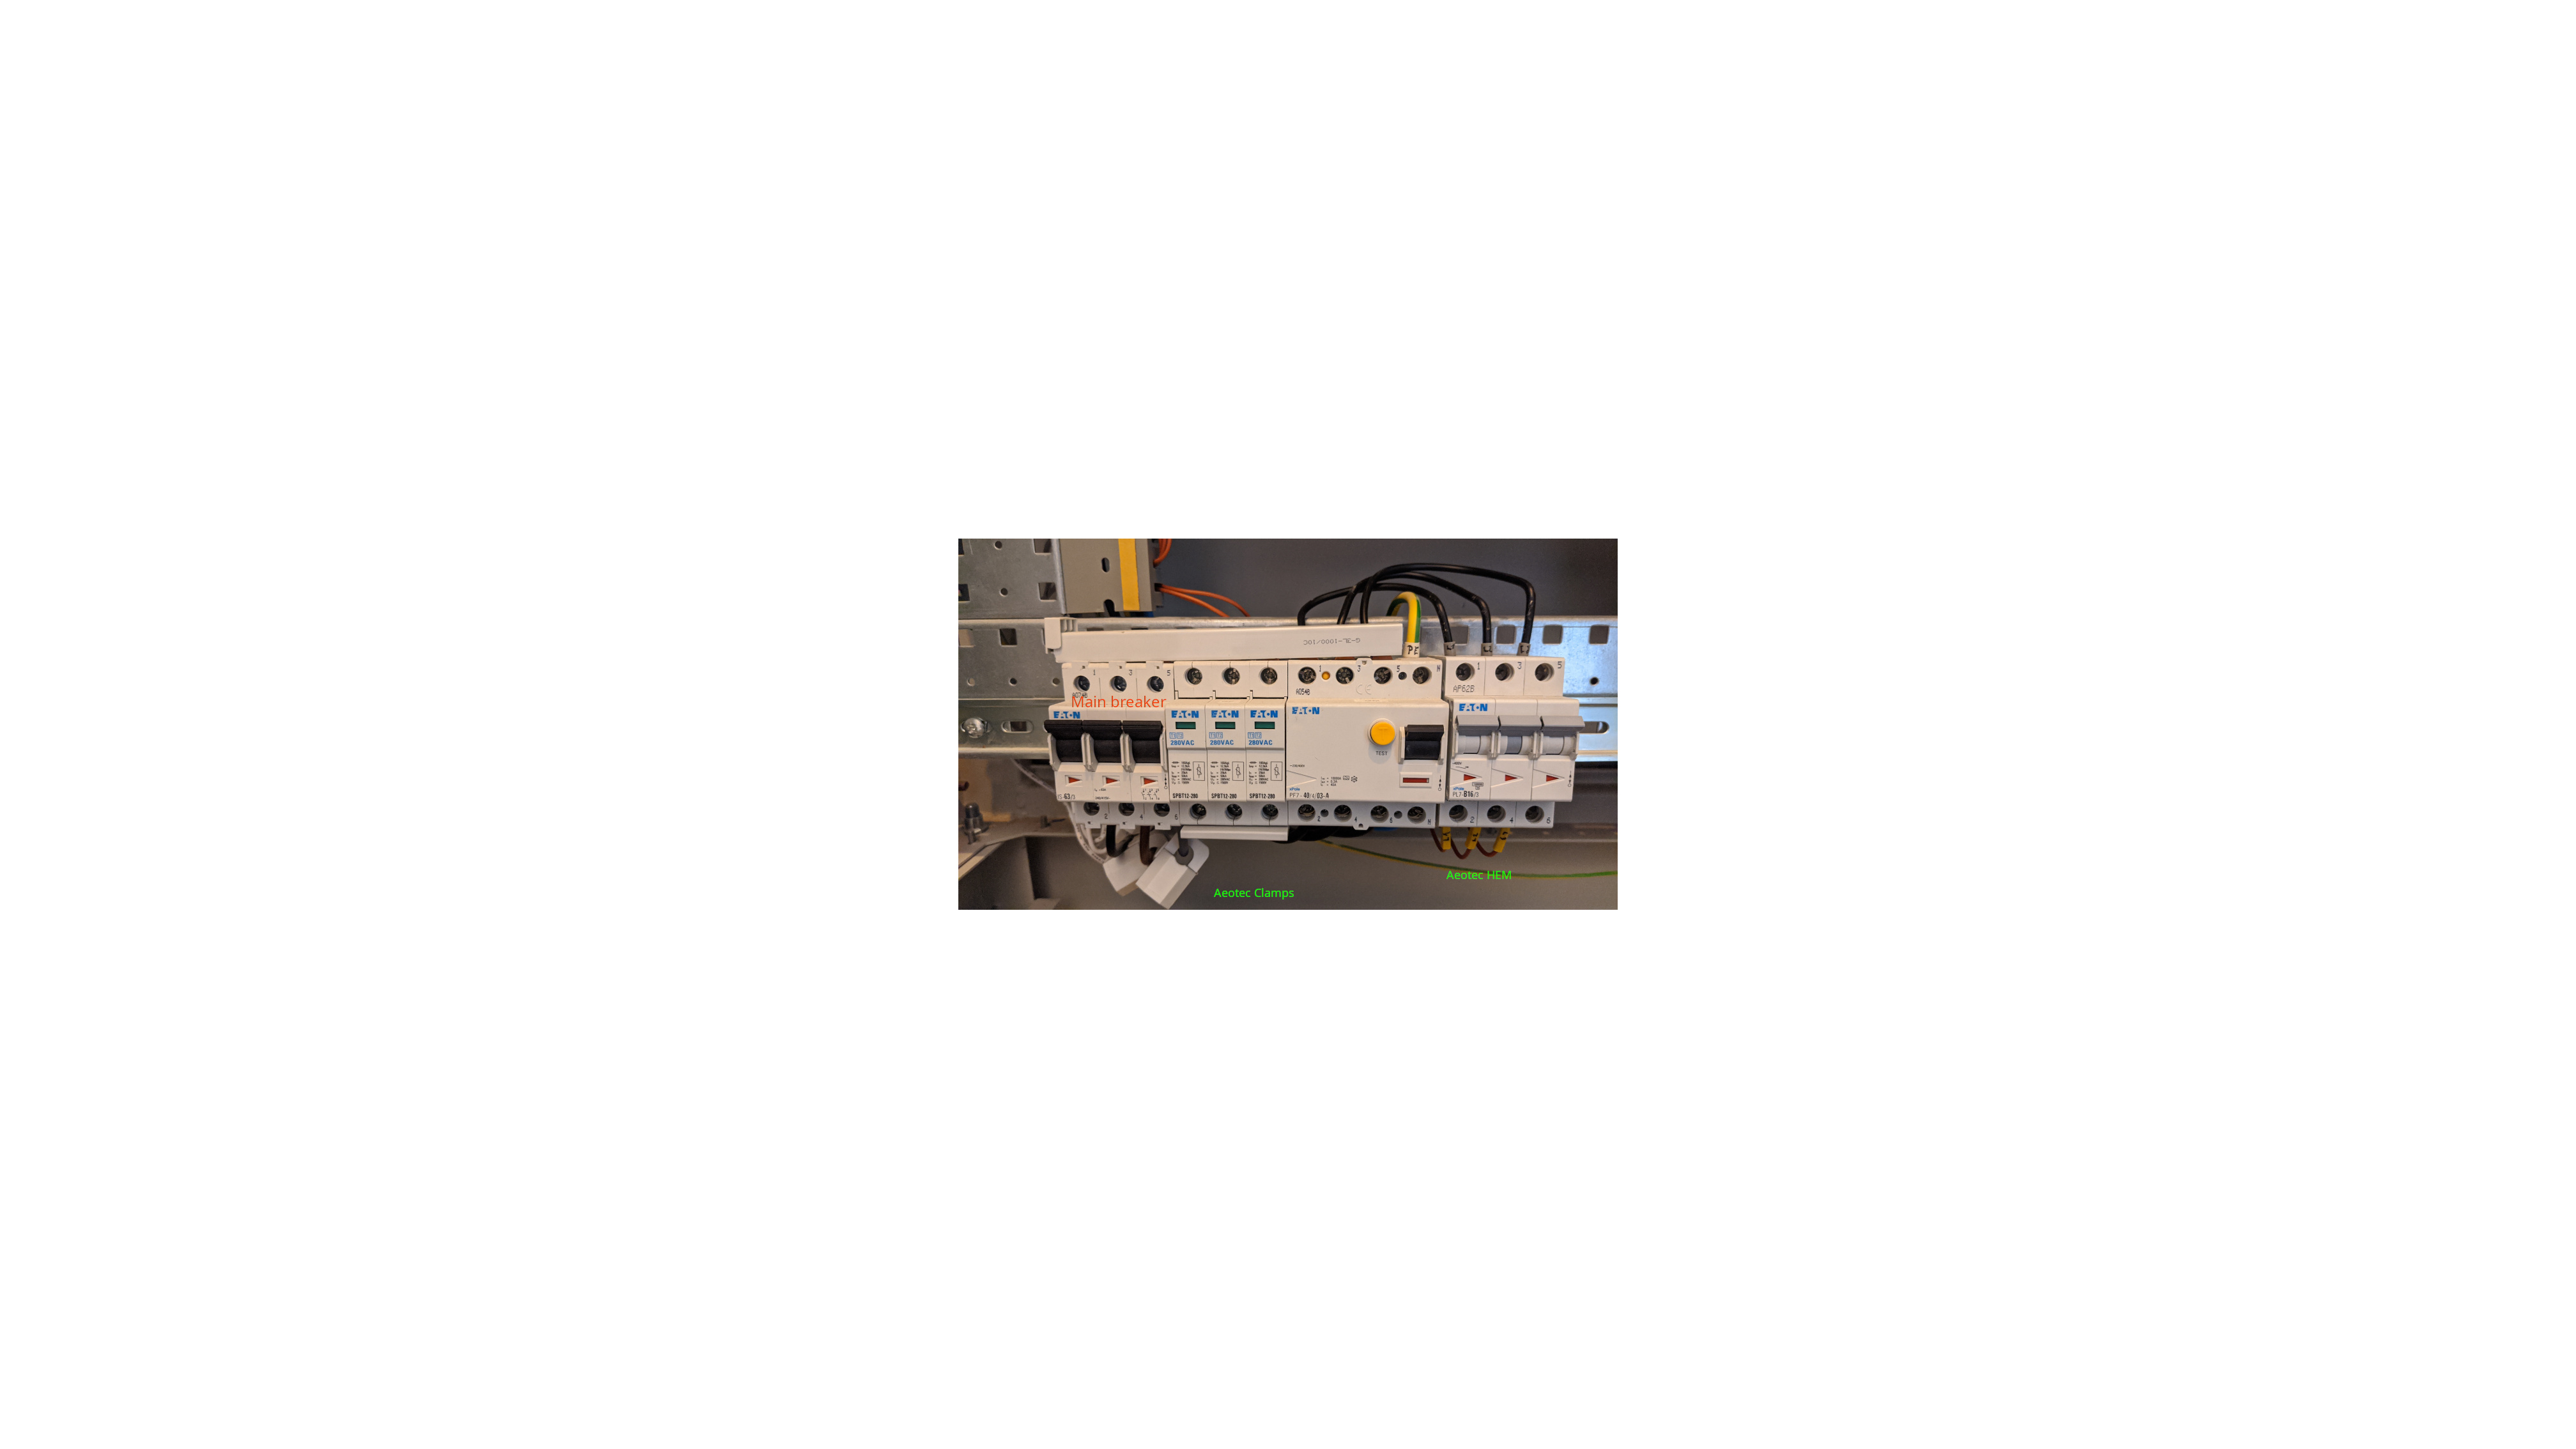
In our case, we mounted our own unit on the side of the distribution board. From the main residual-current device, we routed the individual phases to a separate three-phase breaker—preferably B6. All blue neutral wires ended on the common neutral bar of the main RCD.
WARNING: Perform the installation with the main switch turned off and preferably with the power supply to the house disconnected! If you have no experience with electricity, call a certified electrician! We are not responsible for any damage caused by improper handling!
How to do it
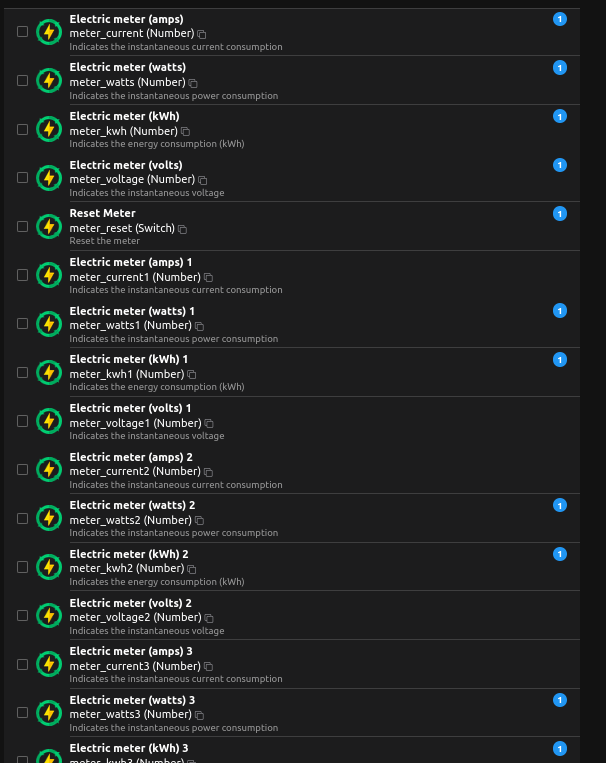
After wiring, pair the Aeotec Home Energy Meter according to the instructions in Part 8 - Wireless Standards: Z-Wave and in the Channels tab, select Add Equipment to Model. Choose which values provided by the Aeotec HEM you want to store. For us, all values shown in the screenshot below were useful. Check them and select Add to Model. Individual Items will be created.
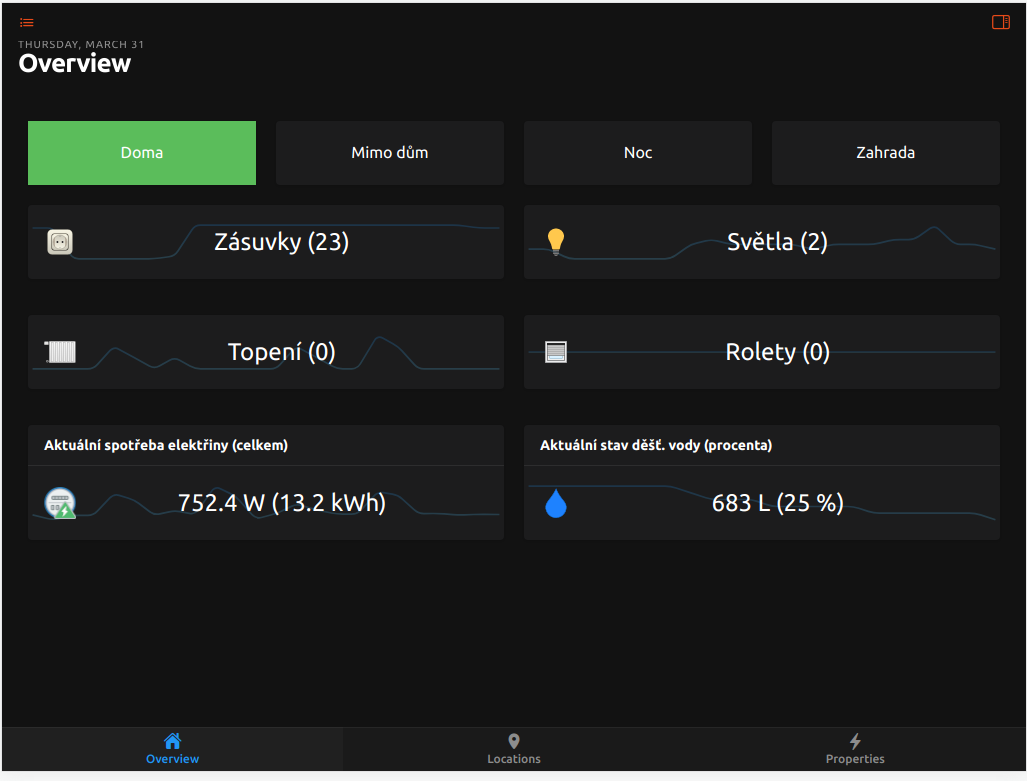
Now you just need to organize these Items in some overview. I preferred placing the basic data on real-time and total consumption on the main screen, with navigation to a separate Page for more detailed information.
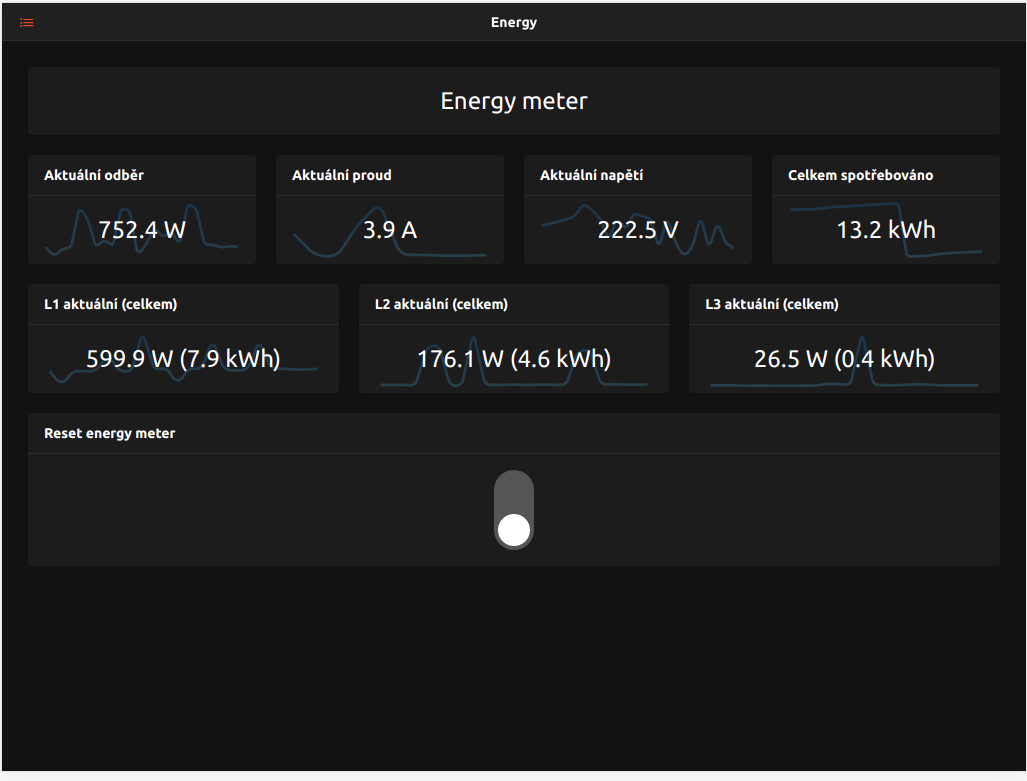
You can also import the entire Page with detailed information from the image above. Don’t forget to change the variable names according to your Items. The Code tab looks like this.
config:
label: Energy
sidebar: true
order: ""
blocks:
- component: oh-block
config: {}
slots:
default:
- component: oh-grid-row
config: {}
slots:
default:
- component: oh-grid-col
config: {}
slots:
default:
- component: oh-label-card
config:
label: Energy meter
- component: oh-grid-row
config: {}
slots:
default:
- component: oh-grid-col
config: {}
slots:
default:
- component: oh-label-card
config:
title: Aktuální odběr
action: analyzer
actionAnalyzerItems:
- ZWaveNode004ZW095HomeEnergyMeter_Electricmeterwatts
item: ZWaveNode004ZW095HomeEnergyMeter_Electricmeterwatts
label: =items.ZWaveNode004ZW095HomeEnergyMeter_Electricmeterwatts.displayState +
' W '
trendItem: ZWaveNode004ZW095HomeEnergyMeter_Electricmeterwatts
- component: oh-grid-col
config: {}
slots:
default:
- component: oh-label-card
config:
title: Aktuální proud
action: analyzer
actionAnalyzerItems:
- ZWaveNode004ZW095HomeEnergyMeter_Electricmeteramps
- ZWaveNode004ZW095HomeEnergyMeter_Electricmeterwatts
actionAnalyzerChartType: month
item: ZWaveNode004ZW095HomeEnergyMeter_Electricmeteramps
label: =items.ZWaveNode004ZW095HomeEnergyMeter_Electricmeteramps.displayState +
' A'
trendItem: ZWaveNode004ZW095HomeEnergyMeter_Electricmeteramps
- component: oh-grid-col
config: {}
slots:
default:
- component: oh-label-card
config:
title: Aktuální napětí
action: analyzer
actionAnalyzerItems:
- ZWaveNode004ZW095HomeEnergyMeter_Electricmetervolts
- ZWaveNode004ZW095HomeEnergyMeter_Electricmeterwatts
actionAnalyzerChartType: month
item: ZWaveNode004ZW095HomeEnergyMeter_Electricmetervolts
label: =items.ZWaveNode004ZW095HomeEnergyMeter_Electricmetervolts.displayState +
' V '
trendItem: ZWaveNode004ZW095HomeEnergyMeter_Electricmetervolts
- component: oh-grid-col
config: {}
slots:
default:
- component: oh-label-card
config:
title: Celkem spotřebováno
action: analyzer
actionAnalyzerItems:
- ZWaveNode004ZW095HomeEnergyMeter_ElectricmeterkWh
- ZWaveNode004ZW095HomeEnergyMeter_Electricmeterwatts
actionAnalyzerChartType: month
item: ZWaveNode004ZW095HomeEnergyMeter_ElectricmeterkWh
label: =items.ZWaveNode004ZW095HomeEnergyMeter_ElectricmeterkWh.displayState + '
kWh '
trendItem: ZWaveNode004ZW095HomeEnergyMeter_ElectricmeterkWh
- component: oh-grid-row
config: {}
slots:
default:
- component: oh-grid-col
config: {}
slots:
default:
- component: oh-label-card
config:
item: ZWaveNode004ZW095HomeEnergyMeter_Electricmeterwatts1
label: =items.ZWaveNode004ZW095HomeEnergyMeter_Electricmeterwatts1.displayState
+ ' W
('+items.ZWaveNode004ZW095HomeEnergyMeter_ElectricmeterkWh1.displayState
+ ' kWh)'
title: L1 aktuální (celkem)
trendItem: ZWaveNode004ZW095HomeEnergyMeter_Electricmeterwatts1
action: analyzer
actionAnalyzerItems:
- ZWaveNode004ZW095HomeEnergyMeter_Electricmeterwatts1
actionAnalyzerChartType: month
- component: oh-grid-col
config: {}
slots:
default:
- component: oh-label-card
config:
item: ZWaveNode004ZW095HomeEnergyMeter_Electricmeterwatts1
label: =items.ZWaveNode004ZW095HomeEnergyMeter_Electricmeterwatts2.displayState
+ ' W
('+items.ZWaveNode004ZW095HomeEnergyMeter_ElectricmeterkWh2.displayState
+ ' kWh)'
title: L2 aktuální (celkem)
trendItem: ZWaveNode004ZW095HomeEnergyMeter_Electricmeterwatts2
action: analyzer
actionAnalyzerItems:
- ZWaveNode004ZW095HomeEnergyMeter_Electricmeterwatts2
- component: oh-grid-col
config: {}
slots:
default:
- component: oh-label-card
config:
item: ZWaveNode004ZW095HomeEnergyMeter_Electricmeterwatts1
label: =items.ZWaveNode004ZW095HomeEnergyMeter_Electricmeterwatts3.displayState
+ ' W
('+items.ZWaveNode004ZW095HomeEnergyMeter_ElectricmeterkWh3.displayState
+ ' kWh)'
title: L3 aktuální (celkem)
action: analyzer
actionAnalyzerItems:
- ZWaveNode004ZW095HomeEnergyMeter_Electricmeterwatts3
actionAnalyzerChartType: month
trendItem: ZWaveNode004ZW095HomeEnergyMeter_Electricmeterwatts3
- component: oh-grid-row
config: {}
slots:
default:
- component: oh-grid-col
config: {}
slots:
default:
- component: oh-toggle-card
config:
item: ZWaveNode004ZW095HomeEnergyMeter_ResetMeter
title: Reset energy meter
masonry: null
grid: []
canvas: []
What’s next?
The values of the measured quantities are automatically stored in OpenHAB 3 and can be displayed in a graph. Various rules for controlling other appliances can then be linked to these values. From here, it’s up to you! If you use them in an interesting way, share your experience with us in the comments.
Tip: The Aeotec meter, by default, reports real-time consumption at roughly 30-minute intervals. If you want to shorten this interval, OpenHAB settings alone won’t work. However, it can be done using a short workaround.
1) Download the portable Z-Wave PC Controller program from the end of this link onto your Windows PC.
2) Extract it, open it, and connect the Z-Wave USB Controller from the Raspberry Pi to your PC.
3) Select Settings -> Detect -> Select
4) In the Command Class tab, select COMMAND_CLASS_ASSOCIATION_V1
5) Command Name: ASSOCIATION_SET
6) Set the NodeID to 01 for all three Groups (01, 02, 03)
[[{"fid":"688","view_mode":"wysiwyg","fields":{"format":"wysiwyg"},"type":"media","field_deltas":{"4":{"format":"wysiwyg"}},"attributes":{"style":"display: block; margin-left: auto; margin-right: auto;","class":"media-element file-wysiwyg","data-delta":"4"}}]]
7) Disconnect, reconnect to the RPi, and readings should now follow the value of parameter 111.
Add new comment