

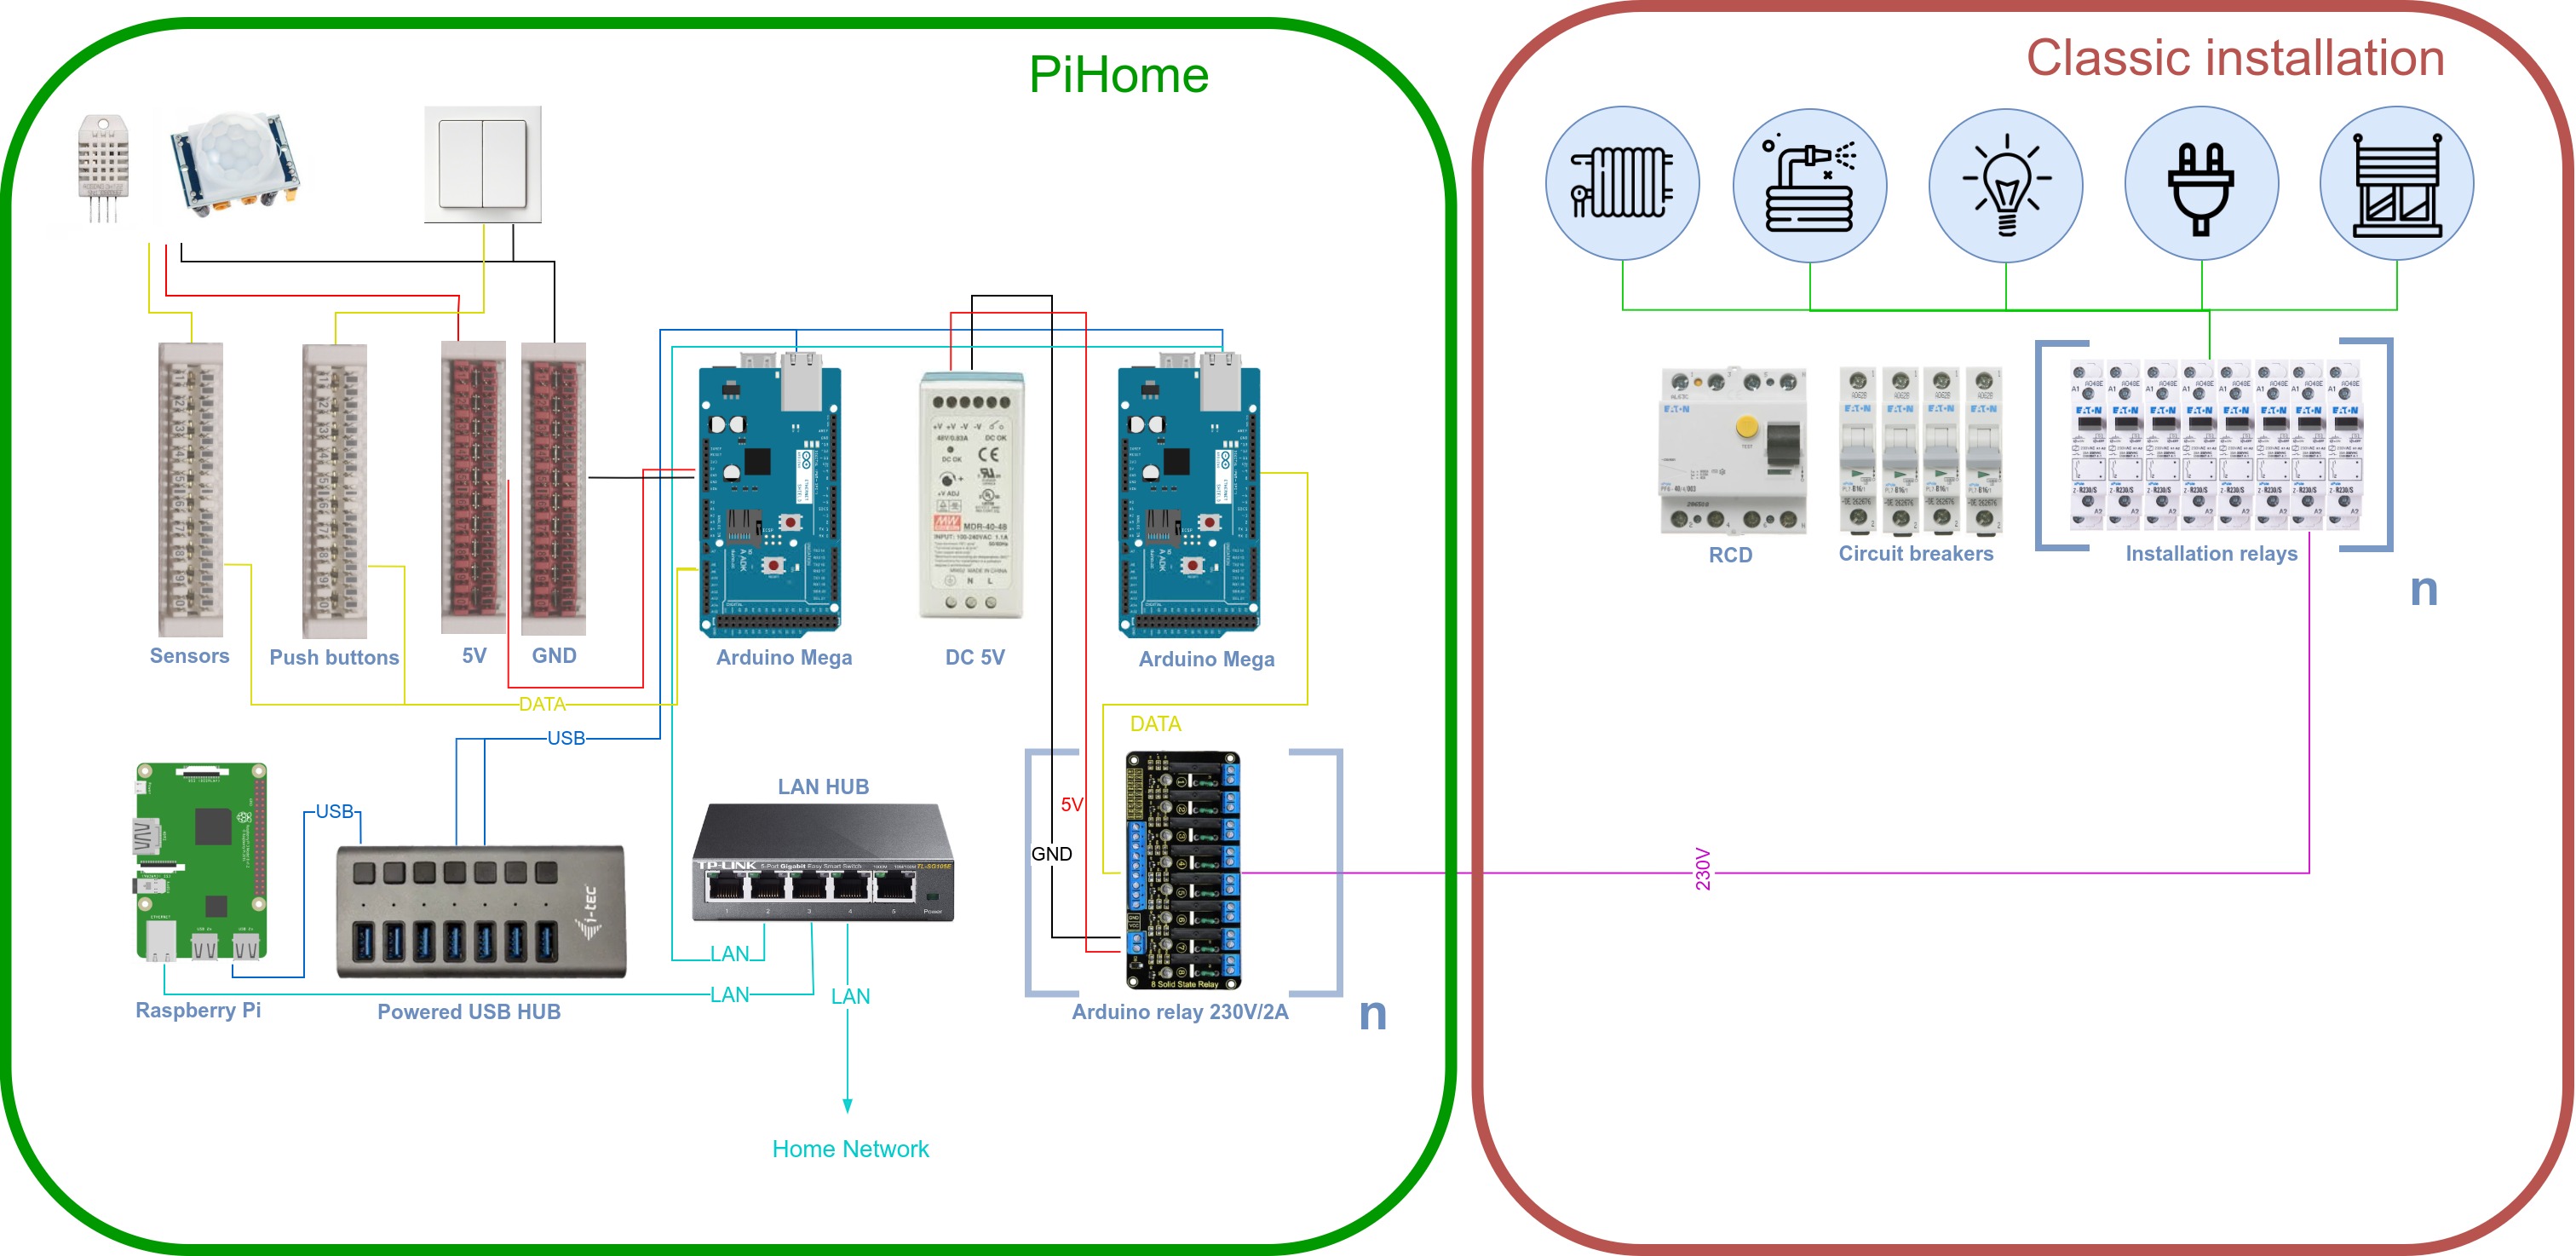
How it works — simple overview
At the center is a Raspberry Pi (RPi) running the automation software (OpenHAB or Home Assistant). The RPi talks to Arduino Mega boards (via USB) that handle local sensors and relays. All devices exchange messages using MQTT — a lightweight, secure communication protocol ideal for smart homes. The whole system runs on your local network (LAN) and can be extended with many MQTT-compatible (Shelly) or wireless devices (Z-Wave, Zigbee, etc.).
Main features
1) Control high-power devices (lights, sockets, pumps, heaters, blinds)
We use Arduino-compatible SSR (solid state relay) modules to control switching logic and pair them with robust installation relays (230V AC / 20A) in a separate high-power distribution board. In short: the electronics on the Arduino do the “thinking,” and industrial-grade relays do the heavy lifting — a safe and reliable setup for powerful household appliances.
2) Control low-power devices (up to 200 W AC: fans, valves, NO/NC contacts)
Smaller relays (230V AC / 2A SSR) can directly switch low-power devices. Boards are available with one to eight outputs, so you can match the hardware to your needs.
3) Sensors (temperature, humidity, motion, etc.)
Sensors are typically wired with UTP (network) cable and terminated in standard KRONE modules in the PiHome distribution board. Each sensor cable usually carries three lines: DATA / GND / 5V. Sensors connect to Arduino Mega boards that run simple firmware and forward readings to the central unit via MQTT.
This approach supports a wide range of Arduino-compatible sensors, keeping hardware cost low while allowing maximum flexibility in how sensors are housed and installed.
5) Pushbuttons
In PiHome pushbuttons are wired with UTP (network) cable and terminated in standard KRONE modules in the PiHome distribution board. Each pushbutton usually carries two lines: DATA / GND. Pushbuttons connect to Arduino Mega boards that run simple firmware and forward readings to the central unit via MQTT.
This approach supports a wide range of pushbuttons of classic suppliers for 110/220V with your preferred design, while allowing maximum flexibility. Bonus is that you don´t have a 220V under the pushbuttons and function can be easily replaced anytime.
6) Wireless friendly
For apartments or reconstructions, OpenHAB and Home Assistant easily integrate with wireless devices such as Shelly, Z-Wave, Zigbee, and many others. These devices can be installed locally right where they’re needed (for example, inside a switch box or next to a controlled device), and they communicate reliably — often over local Wi‑Fi or dedicated wireless meshes.