


To begin with, we will proceed to the installation of the program Winbox - a "must have" if you use MikroTik. Although RouterOS has its web access, the disadvantage of MikroTik is its prevalence and web access is the first target. The advantage of Winbox is that it can scan connected devices without knowing the IP or MAC address and uses its own customizable port 8291 for connection. Otherwise, the functions and appearance of the web interface and Winbox are almost identical.
This guide is identical for any MikroTik device with RouterOS, from a cheap hap mini for 20 € to big rack routers.
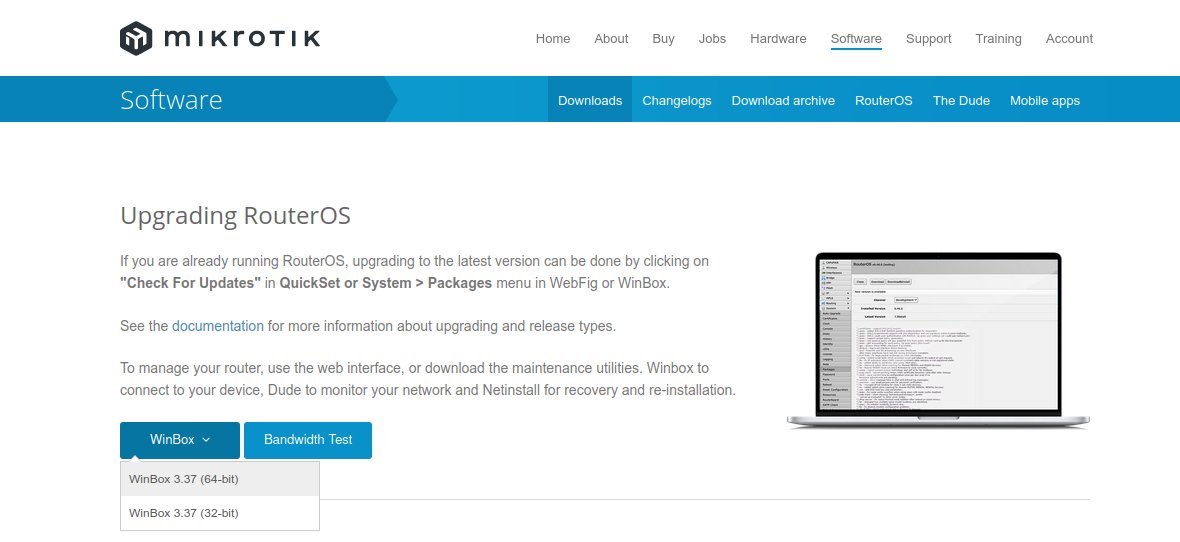
Downloading and Installing Winbox
On the MikroTik website in the Software section, download the installer for Windows and install it.
For Linux users, Winbox is available, for example, in snapstore:
$ sudo snap install winbox
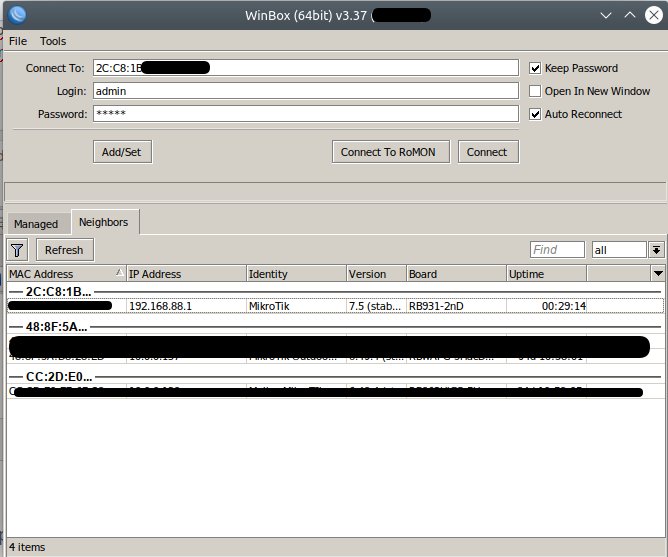
After installation, start Winbox, connect your MikroTik router with a cable to any port labeled "2" and above and connect it to your computer.
Port 1 is usually WAN and may have a firewall.
In the Neighbors tab you should find your device. The default login is username admin and the account has no password.
We are currently using RouterOS version 7.x. For standard home use, we use the default configuration. If you have version 6.x, I recommend upgrading MikroTik to RouterOS 7. Simply download the latest RouterOS for your router from the website and upload the downloaded .npk file in the Files tab. When you reboot, the .npk file will be used to upgrade your router.
Getting started with configuration
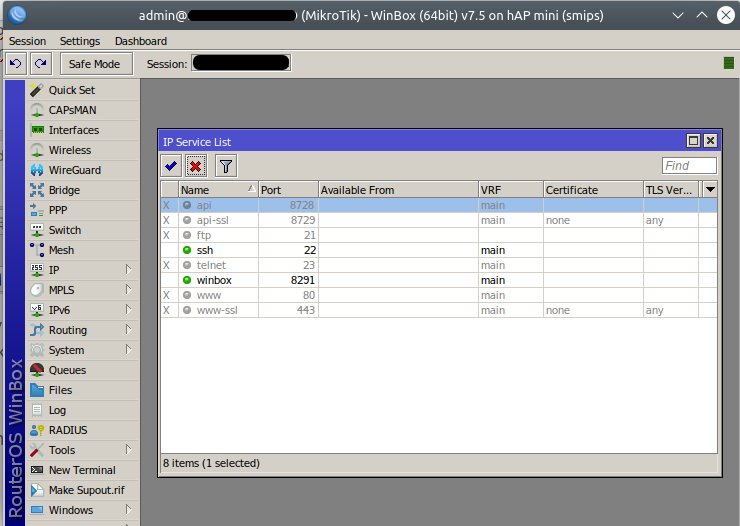
The first step will be to turn off all services that we will not be using. In the IP-> Services tab, we only leave Winbox and possibly SSH. You can customize Winbox port if you want. (Choose above 25000 as the major scans are scanned from etc. 1 - 10000 range because Higher range = Slower performance)
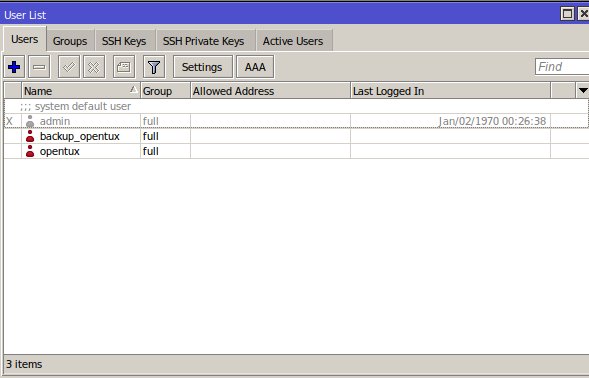
Then in the System->Users tab, we deactivate the default admin, create our own, and also save one backup account with admin rights (full). The rule of administrators applies - always have two admin accounts.
Basic settings for the primary network and guest network
In our model example, we want to have one primary home network and one guest network. Guests cannot see the primary network or each other and only have access to the internet. We do not address Ethernet ports, where the home network is everywhere, and we assume that when we have someone at home, they are a trustworthy persons. It is also popular to have a third network for various IoT devices such as smart vacuum cleaners, refrigerators, Alexas, etc. You can create this third network the same way as the guest network in the examples below, but it's not "must have" as guest network is isolated as well.
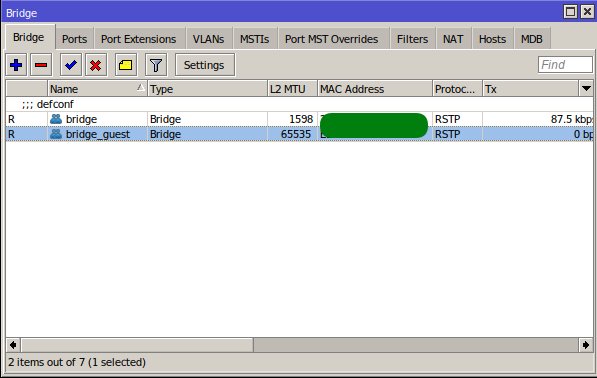
In the Bridge tab, we add another bridge for guests called bridge_guest in addition to the default bridge.
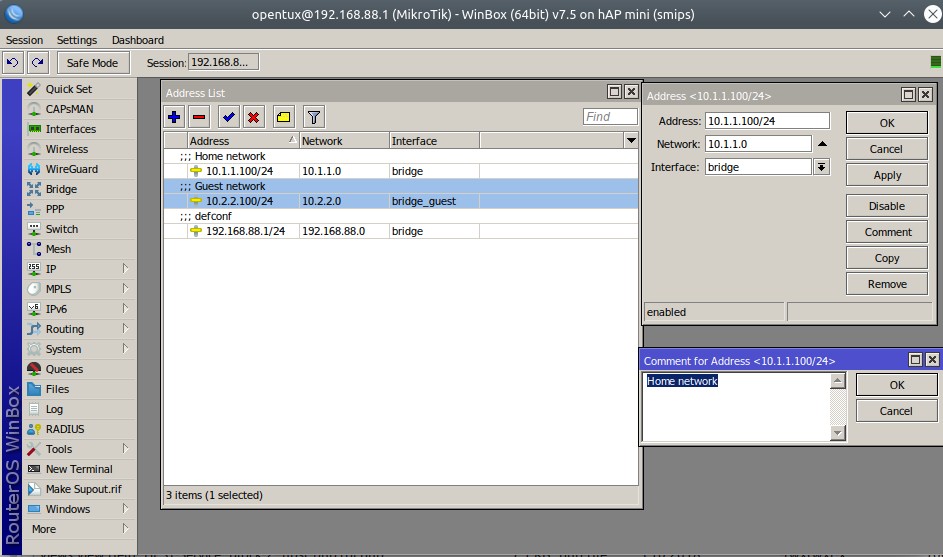
In the IP->Addresses tab, add two new ranges for the home and guest networks. In our example, we chose 10.1.1.0 for the home network and 10.2.2.0 for the guests.
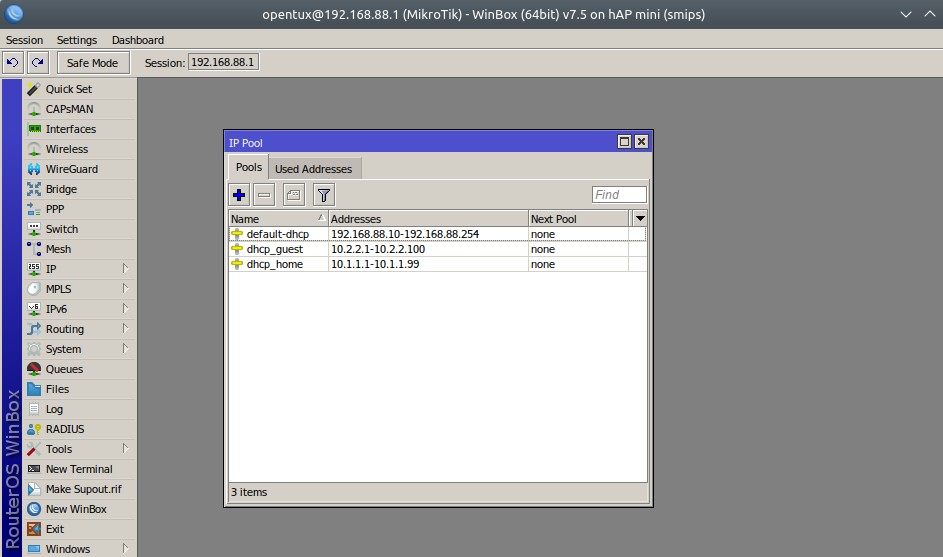
Then, in the IP->Pool tab, add ranges of addresses that you want to assign to each network.
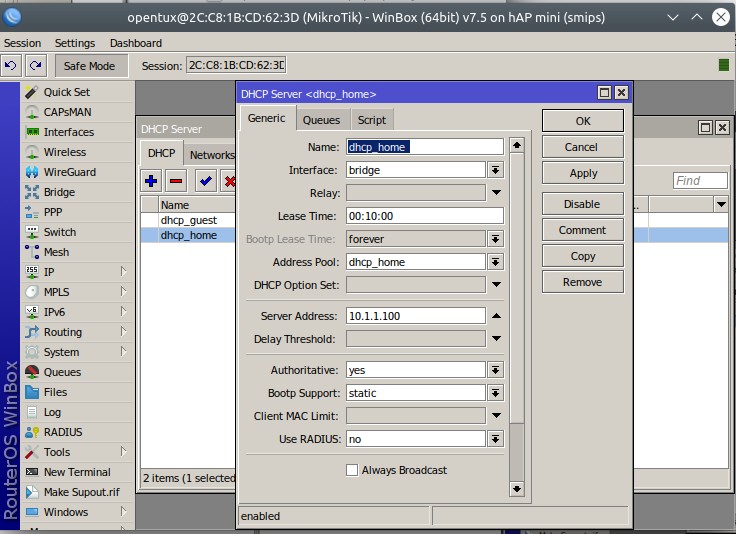
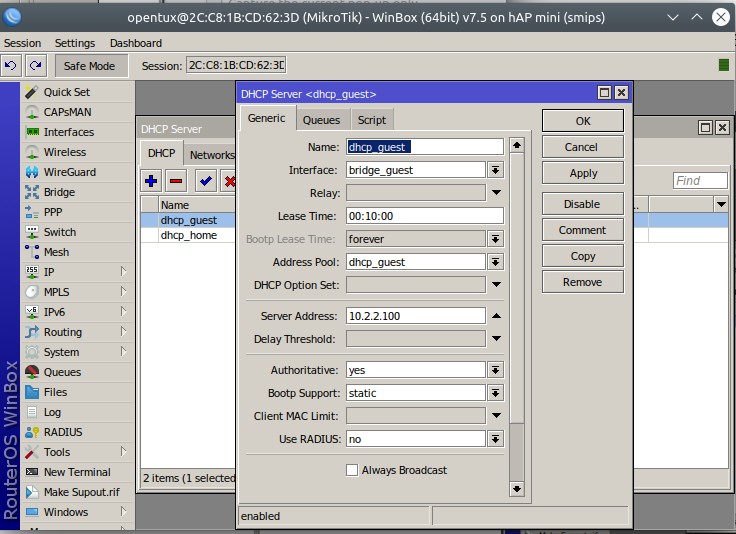
Next step, in the IP->DHCP Server tab, modify the existing default record for the home network:
Then, add a new record with the "+" icon for the guest network:
and in the Networks tab, add both networks:
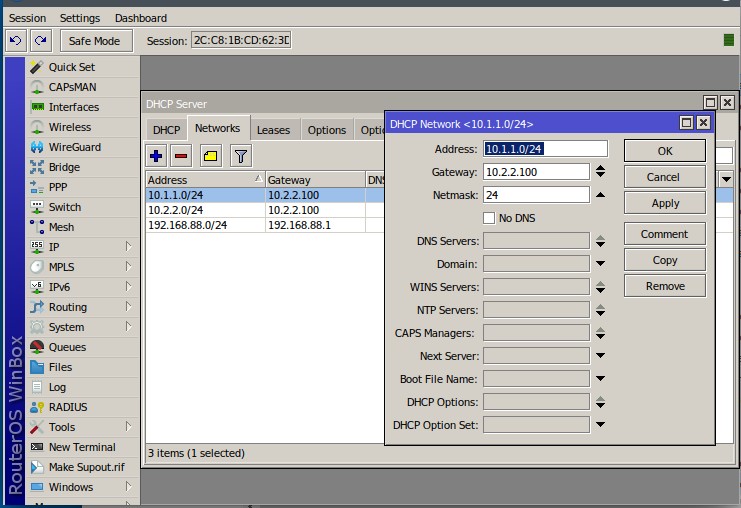
Here it is. Now delete the default address 192.168.88.x from the records in the tabs IP->DHCP Server -> Networks, IP->Pool, IP-> Addresses. Disconnect and you should see that your MikroTik now has an address such as 10.1.1.100 as in our model case.
Why do we choose the 10.x.x.x range?
In a corporate environment, we often encounter the range of 192.168.0.1, 192.168.1.1, etc. If you have a VPN there and hit the same range, you get into conflict. That's why in home conditions, we rely on the range of 10.x.x.x
Changing the default SSID (WiFi network name), password and adding an SSID for guests
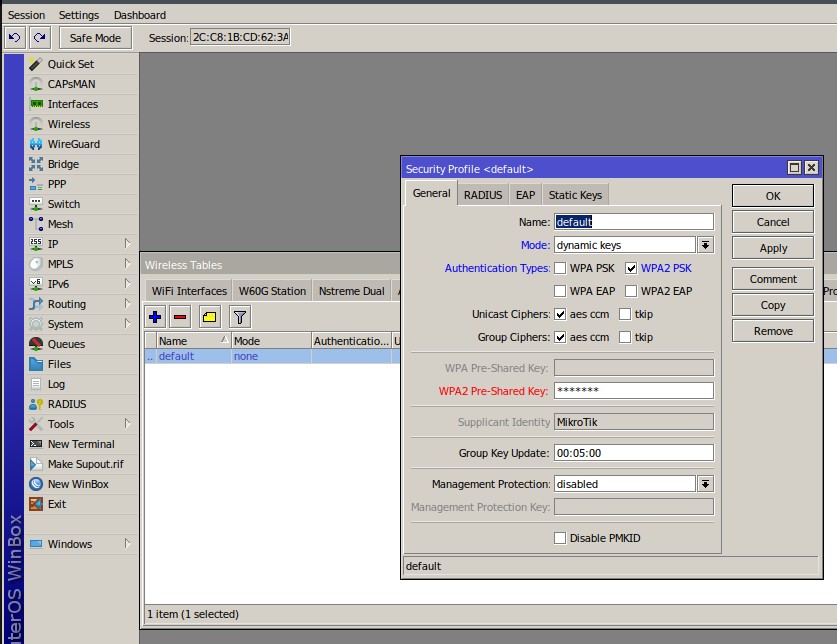
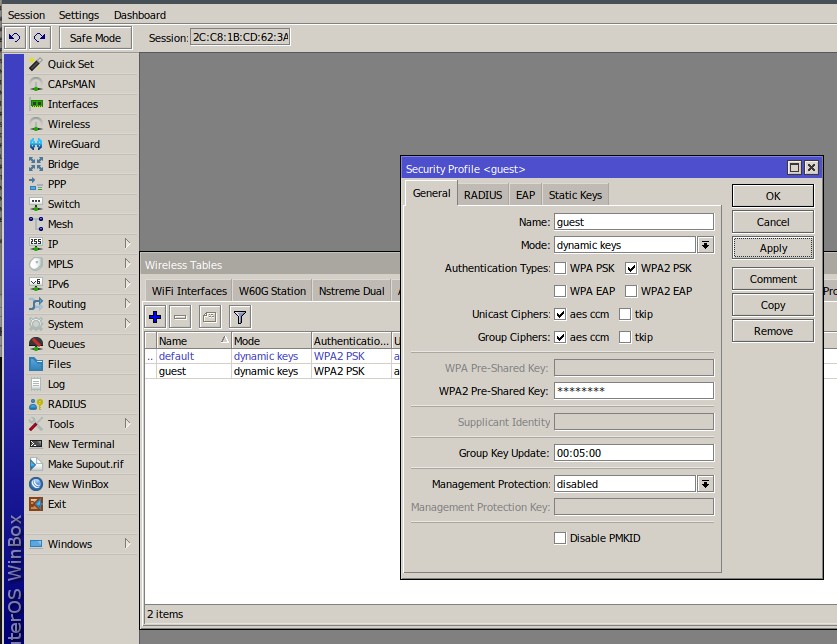
In the Wireless -> Security Profiles tab, modify the default settings according to the first screen. Enter your own password, at least 8 characters long, and also add a security profile for the guest network:
For guests:
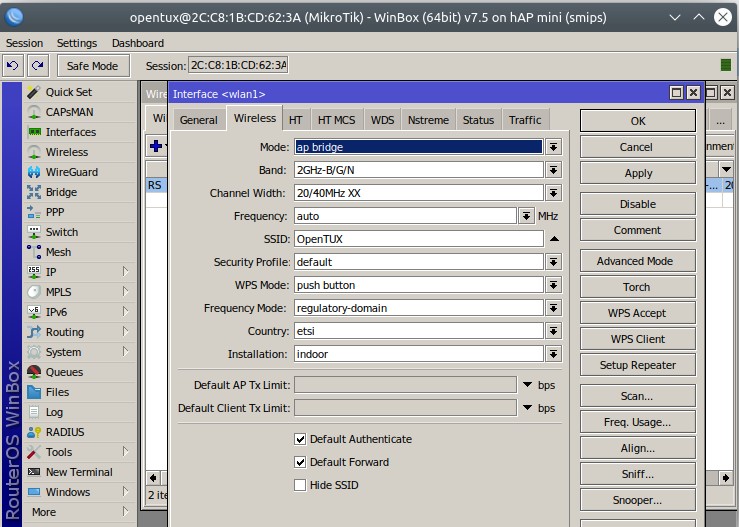
Now we switch to Wireless -> WiFi Interfaces and modify the network name (SSID) and optionally change the security profile (password) in the first record. In our case, we changed the default profile:
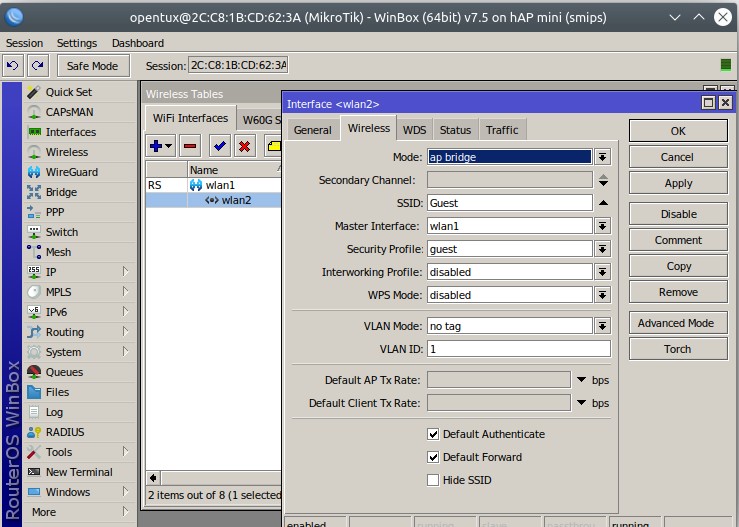
Click the "plus" icon and add a "Virtual" interface. Enter the network SSID for guests and the security profile:
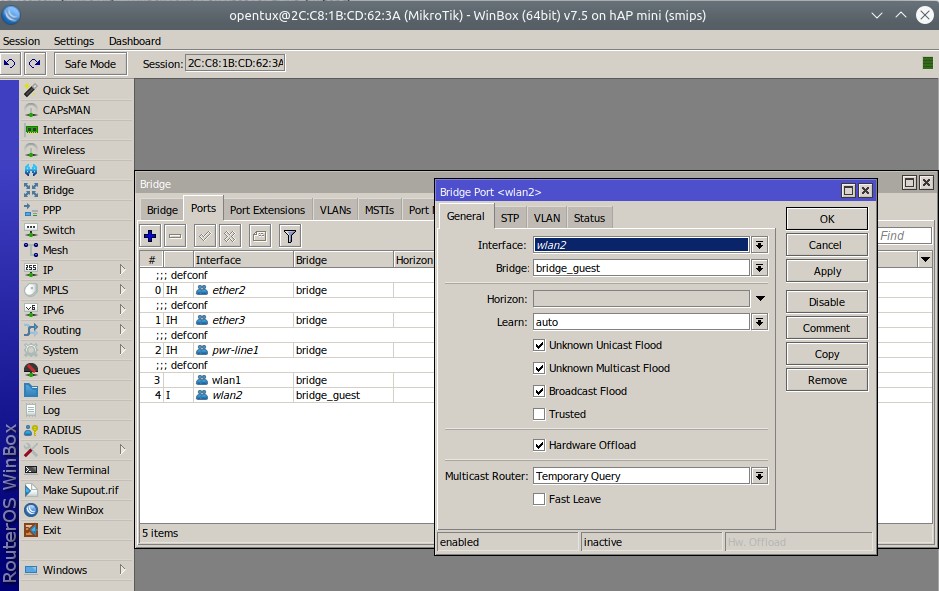
To enable the guest network, we also add "wlan2" to the bridge_guest we created at the beginning. After connecting to the guest network, you will not be able to see the primary network 10.1.1.0, which is the purpose.
Similarly, you can also add a third network, for example for IoT devices that you do not trust.
Add new comment