

If you have a smart-home, NAS, etc., it's a good idea to think about safe access to your network when you are not at home. Currently I recommend commercial router like Turris or a cheaper option of MikroTik routers. In the other hand, Raspberry Pi can be used as OpenVPN server too. In this article, we will show how to set up secure access to your home network from the internet using OpenVPN on MikroTik routers.
Tip:
Today's is much more easier to setting Wireguard VPN on MikroTik routers (from Router OS 7). Wireguard is faster, easy to setup with high security. Wireguard client is available for Linux, Android, iOS and Windows. You can find tutorial in left menu on this blog.
Connect to MikroTik via the web interface. You can use the Router OS web interface, which includes the following screens, or the Winbox app.
Default port for OpenVPN is 1194. You can customize it as you want, but do not forget to allow port on your firewall. In section IP-> Firewall, add row as below::
Firewall
![]()
Chain: input
Protocol: (6) tcp
Dst.Port: 1194
Action: accept
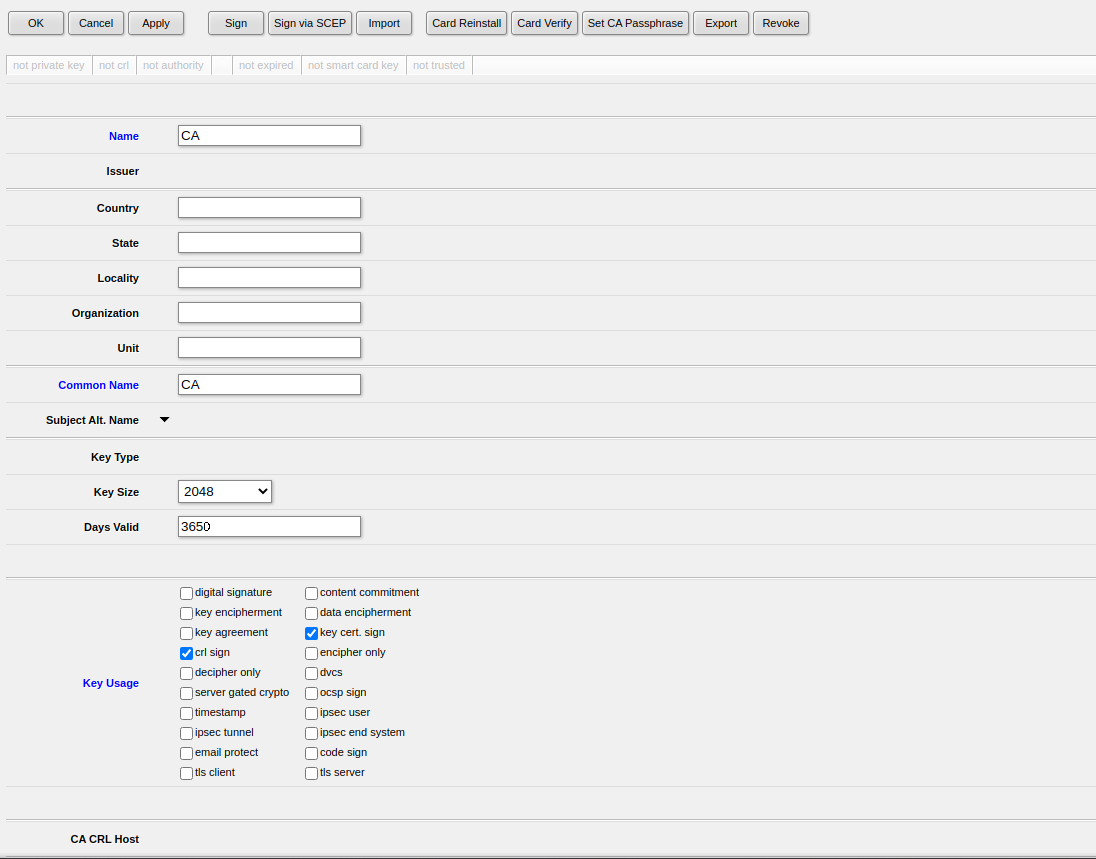
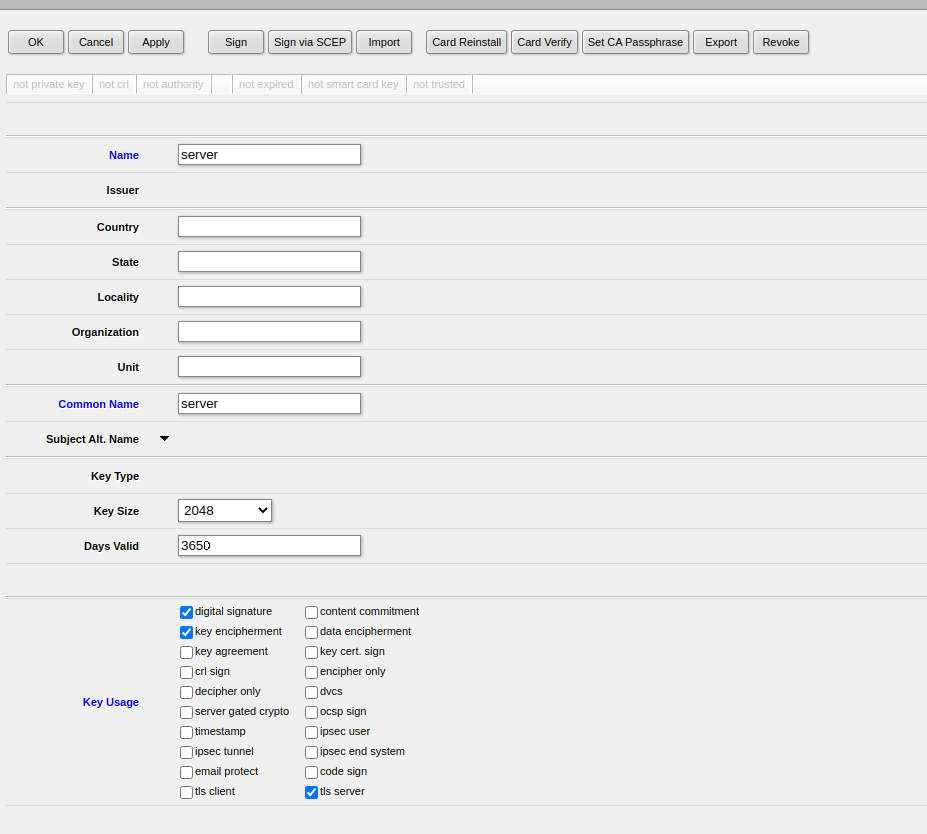
1) Certificates
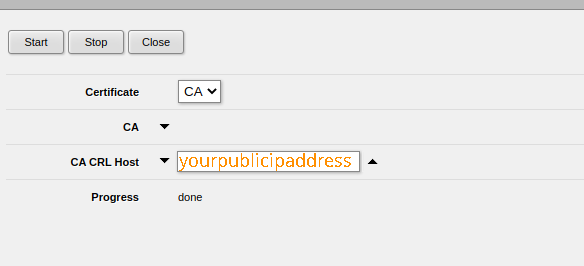
First, we create ca, server and client certificates (you can use any name). In System -> Certificates, click Add new and, after completing the fields, sign it immediately using the Sign option. Put your Public IP address to CA CRL Host field as on picture below.
CA certificate
Server certificate
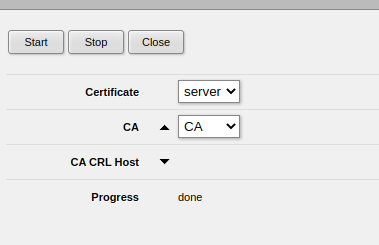
Client certificate
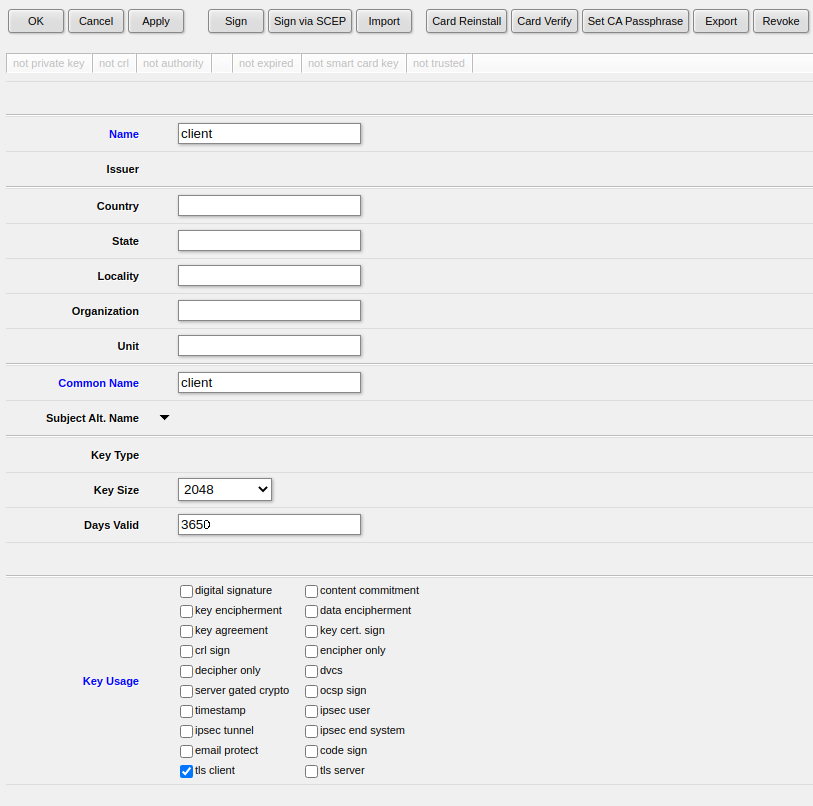
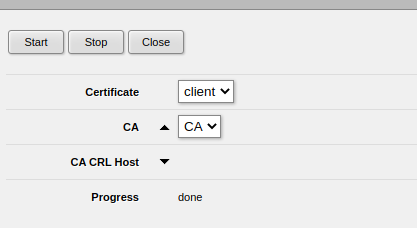
The whole settings under certificates should looks like this:
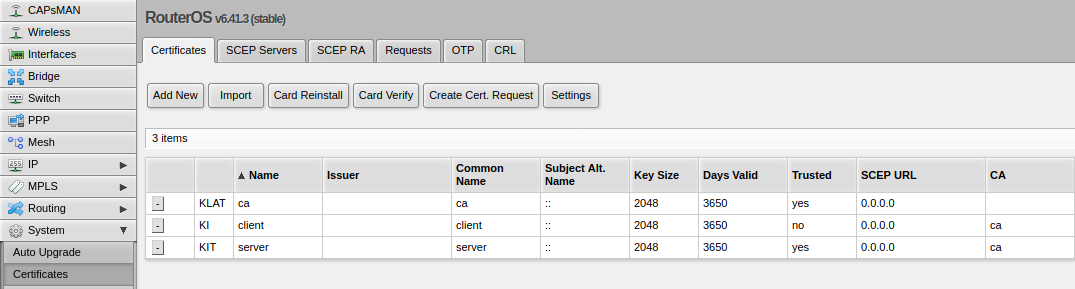
Next, download the certificates to your computer. You can find it in the Files section from the left menu.

2) Address range
We create our own address range for VPN. If you have a primary "Pool" range, such as 192.168.1.1-100, you can create another or use some part of the existing range, such as 192.168.1.201-230, etc. The settings can be done in menu IP -> Pool

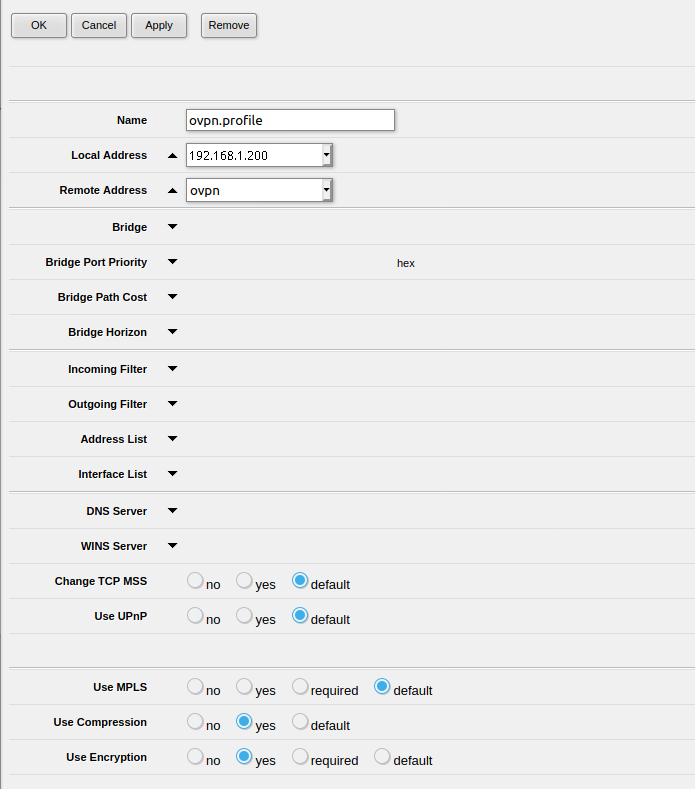
3) Profile creation and VPN service launch
In PPP -> Profiles, create a new profile using "Add new." Fill in any name and set Local Address to an address that is not occupied and not in any range. In this example, 192.168.1.200. In the Remote address, select the range from the previous point.
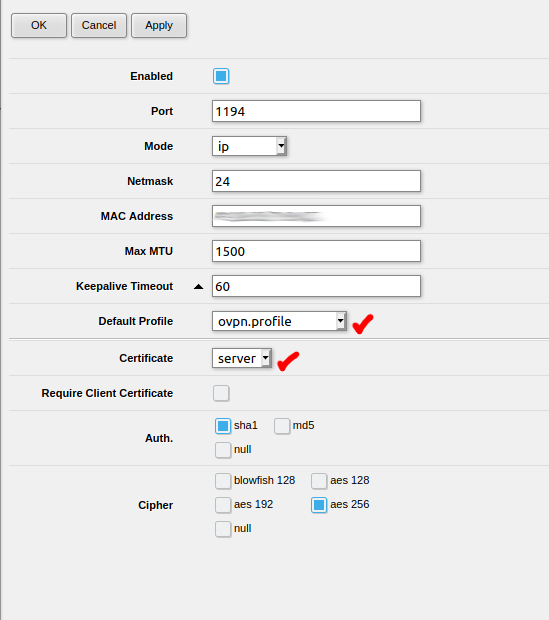
Then, in the PPP -> Interface -> OVPN server tab, click "Enabled," choose the port (default image), and VPN profile and server certificate. Select Auth and Cipher section as shown below:
4) VPN Accounts
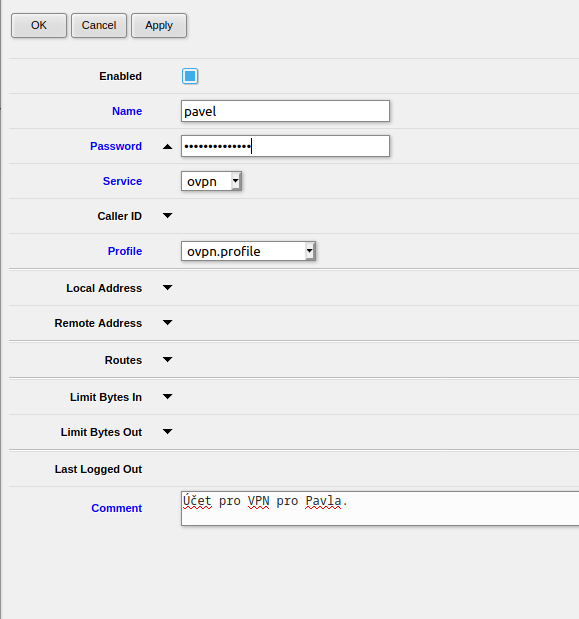
In the PPP -> Secrets tab, use "Add new" to add a new user. In this example, we can see how account for Paul might look like. Be sure to choose a strong password, select a service and profile created earlier.
That's all!!!
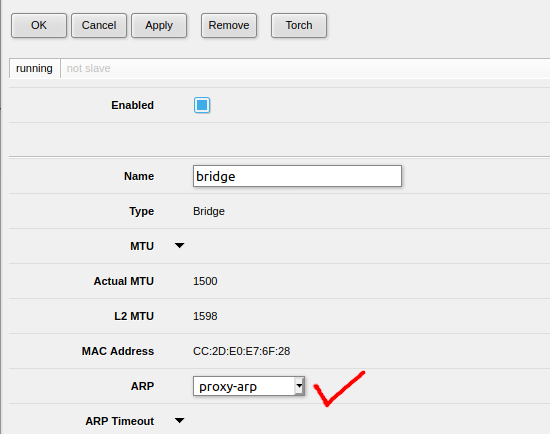
Tip: To allow users to access your primary range via VPN, where you have such as smart home, NAS, etc., you still need to make last setting, in Interfaces on "bridge" set in the ARP section - proxy-ARP
5) Configuration file
To make it as easy as possible for the users you give access to, create a configuration file, such as VPN.ovpn, where the following data will be available. Replace the orange text with your external address and your certificate contents generated on MikroTik.
client
remote YourPublicIPAddress 1194
auth-user-pass
cipher AES-256-CBC
dev tun
proto tcp
nobind
auth-nocache
script-security 2
persist-key
persist-tun
user nobody
group nobody
push "redirect-gateway autolocal def1"
push "redirect-gateway def1"
<ca>
-----BEGIN CERTIFICATE-----
//paste content of your CA downloaded file
-----END CERTIFICATE-----
</ca>
<cert>
-----BEGIN CERTIFICATE-----
//paste content of your Client CRT downloaded file
-----END CERTIFICATE-----
</cert>
<key>
-----BEGIN ENCRYPTED PRIVATE KEY-----
//paste content of your Client key downloaded file
-----END ENCRYPTED PRIVATE KEY-----
</key>
Send configuration file by email to user and share credentials via mobile phone separately. You can also find how to connect to existing OpenVPN from Android or iOS in this blog.
Add new comment