

In this article, you can find how to indicate water level in the reservoir (e.g. rainwater tank). The values are converted into the volume in liters. This feature enables you to automatically fill the tank when needed or predict any other situations (e.g. irrigation volume).
Hardware
Ultrasonic waterproof distance sensor JSN-SR04T
Pi-Home - if you don't have it, see How to section
Software
OpenHAB
Application
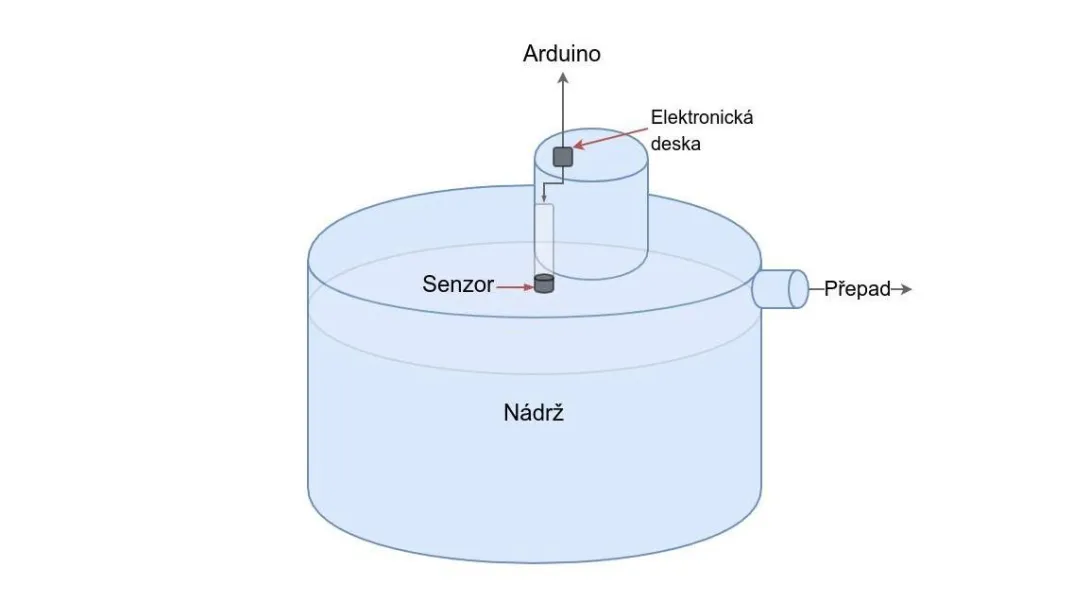
Sensor JSN-SR04T consists of two parts, an electronic board and a water-resistant sensor. The electronic part must be near the tank stored in a water-resistant case. The sensor is operating based on acoustic waves. For more information see for example this link: https://www.electronicwings.com/sensors-modules/ultrasonic-module-hc-sr04. The sensor can measure from about 20 cm to 450 cm at an angle of about 45°. It is therefore very important that there are no obstacles near the sensor and also on the sides. It is ideal to have your own sensor in a plastic tube and place it about 25 cm above the maximum water level in the middle of the tank.

How to
We can fit the sensor in any tube. The sensor head is 25 mm in diameter so use tube with same or larger internal diameter and attach sensor on one end. Fix the tube to the reservoir. Connect cable to an electronic board. We are using 3D printed case for electronic board. Electronic board is connected to the Arduino board. We are using CAT6 UTP cable. You will need to use four wires. Plug in four wires depending on how it looks on the Arduino plate of the sketch, see below.
Next, we'll upload a sketch to Arduino. Sketch load and send distance values from the sensor. Then there is the conversion into tank volume. Focus and edit this part of the sketch according to your tank. The code can, of course, be combined to collect distance, temperature, PIR and other useful sensors on one Arduino board.

Full sketch:
/*
Script to read volume of liquid medium in water tank
- connect to MQTT server
- publishes "Hello world - Arduino XYZ" to the topic
- read sensor value, calculate volume and filter results
- multiple arduino's with same generic sketch can run parallel to each other
- multiple arduino's need each to have a unique ip-addres, unique mac address and unique MQTT client-ID
- tested on arduino-mega with W5100 ethernet shield
*/
//MQTT
#include <SPI.h>
#include <Ethernet.h>
#include <PubSubClient.h>
//Tank level
#include <NewPing.h>
#include <MedianFilter.h>
#include <Wire.h>//Tank Level
#define TRIGGER_PIN 3
#define ECHO_PIN 4
#define MAX_DISTANCE 200 // (in centimeters). Maximum distance we want to ping for (in centimeters). Maximum sensor distance is rated at 400-500cm.
NewPing sonar(TRIGGER_PIN, ECHO_PIN, MAX_DISTANCE);
MedianFilter filter(31,0);//Time variable
unsigned long time_now = 0;//Char strings for MQTT
char tankDV[10];
//---------------------------------------------------------------------------// Arduino MAC address must be unique for every node in same network
byte mac[] = { 0xCC, 0xFA, 0x00, 0x1B, 0x19, 0x77 };// Unique static IP address of Arduino
IPAddress ip(192,168,4,101);// IP Address of your MQTT broker (OpenHAB server)
byte server[] = { 192,168,4,30 };// Handle and convert incoming MQTT messages ----------------------------------------
void callback(char* topic, byte * payload, unsigned int length) {
}// Initiate instances -----------------------------------
EthernetClient arduino_XYZ;
PubSubClient client(server, 1883, callback, arduino_XYZ);
//-------------------------------------------------------
void setup()
{
// Setup ethernet connection to MQTT broker
Ethernet.begin(mac, ip);
if (client.connect("arduino_XYZ", "openhabian", "openhabian")) { // change as desired - clientname must be unique for MQTT broker
client.publish("sensors","Hello world - here Arduino XYZ with IP 192.168.4.101");
}
}
//-----------------------------------------------
long lastReconnectAttempt = 0;boolean reconnect() {
if (client.connect("arduino_XYZ", "openhabian", "openhabian")) {
// Once connected, publish an announcement...
client.publish("sensors","Arduino XYZ - reconnected");
// ... and resubscribe
client.subscribe("sensors");
}
return client.connected();
}
//----------------------------------------------void loop()
{
if (!client.connected()) {
long now = millis();
if (now - lastReconnectAttempt > 5000) {
lastReconnectAttempt = now;
// Attempt to reconnect
if (reconnect()) {
lastReconnectAttempt = 0;
}
}
} else {
// Client connectedclient.loop();
}
// Collect sensor data every 30 seconds. Change value 30000 ms to another if you want
if(millis() >= time_now + 30000){
time_now += 30000;//============TANK LEVEL SENSOR============================
unsigned int otank1,uStank1 = sonar.ping(); // Send ping, get ping time in microseconds (uStank1).
filter.in(uStank1);
otank1 = filter.out();
//Calculate volume in litres (add values in centimeters): ((sensor height from bottom - sensor value) * pi * r2)/1000
float cmtank1 = ((160-(otank1 / US_ROUNDTRIP_CM))*3.14*6400)/1000;
//Filter value - we should get only values between maximum volume of tank and minimum volume
if ((cmtank1 <=2700) && (cmtank1 >= 50)){
dtostrf(cmtank1,3, 0, tankDV);
client.publish("pihome/sensor/water/rain", tankDV);
}
}
delay(1000);
}// End of sketch ---------------------------------
OpenHAB
We can easily get the values into OpenHAB 3 by creating Thing (type MQTT). Then add Channel to listen MQTT topic "pihome/sensor/water/rain". My tab "Code" under Thing looks like below:
UID: mqtt:topic:pihome:sensors-other
label: Sensors other
thingTypeUID: mqtt:topic
configuration: {}
bridgeUID: mqtt:broker:pihome
channels:
- id: SW101
channelTypeUID: mqtt:number
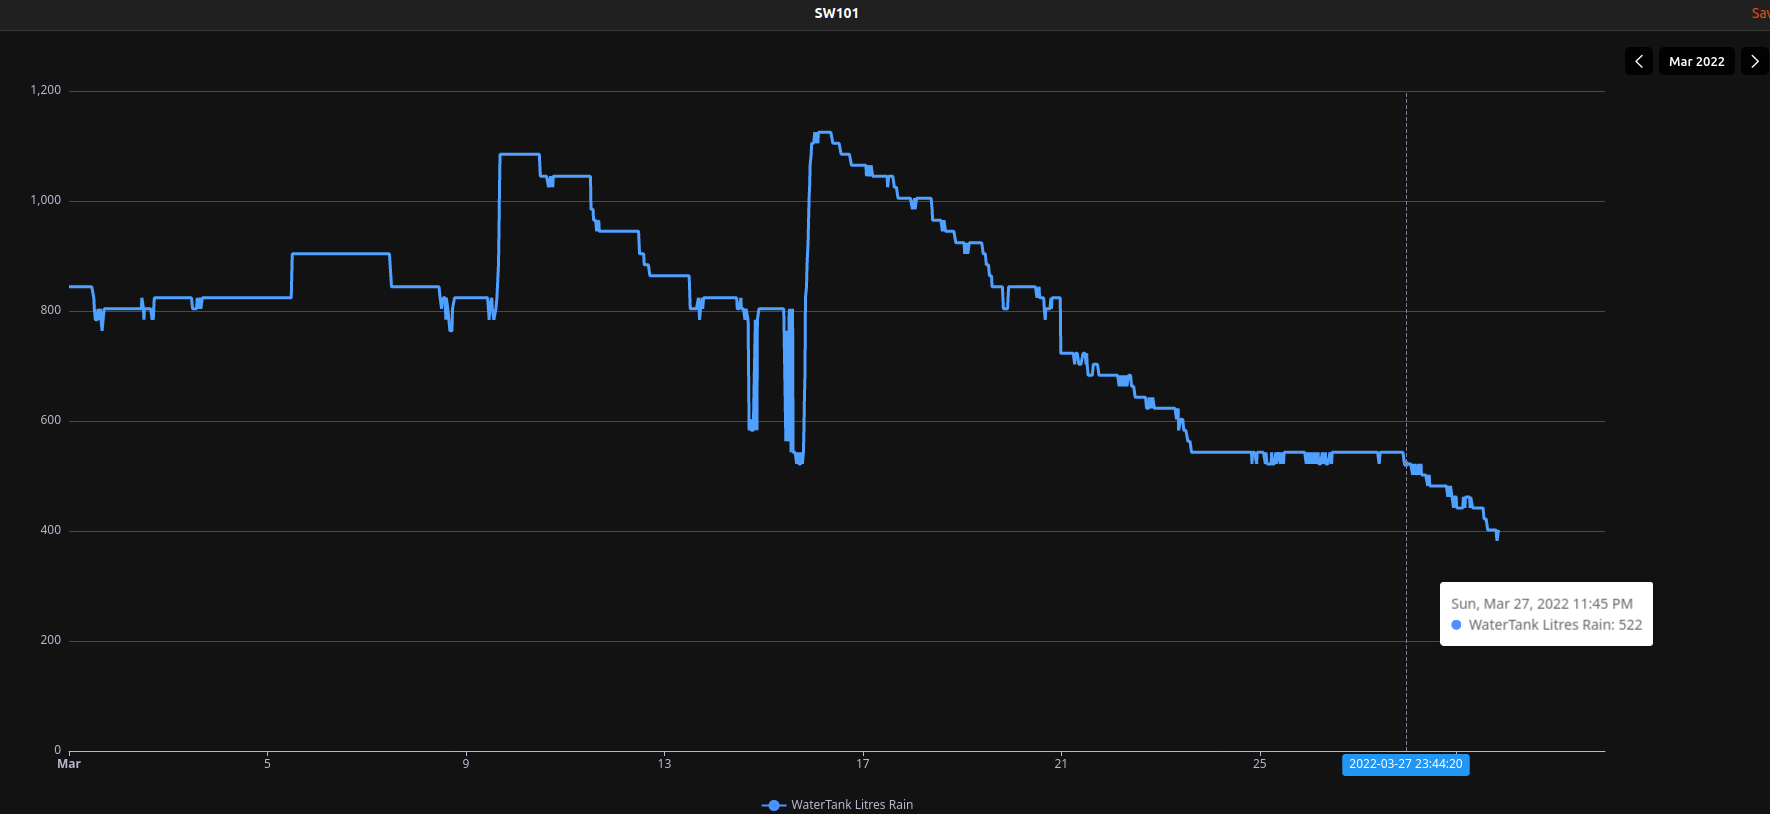
label: WaterTank Litres Rain
description: null
configuration:
stateTopic: pihome/sensor/water/rain
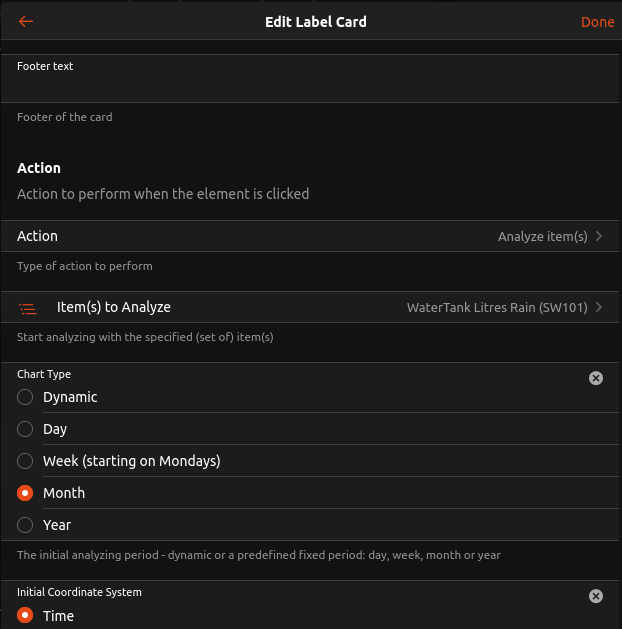
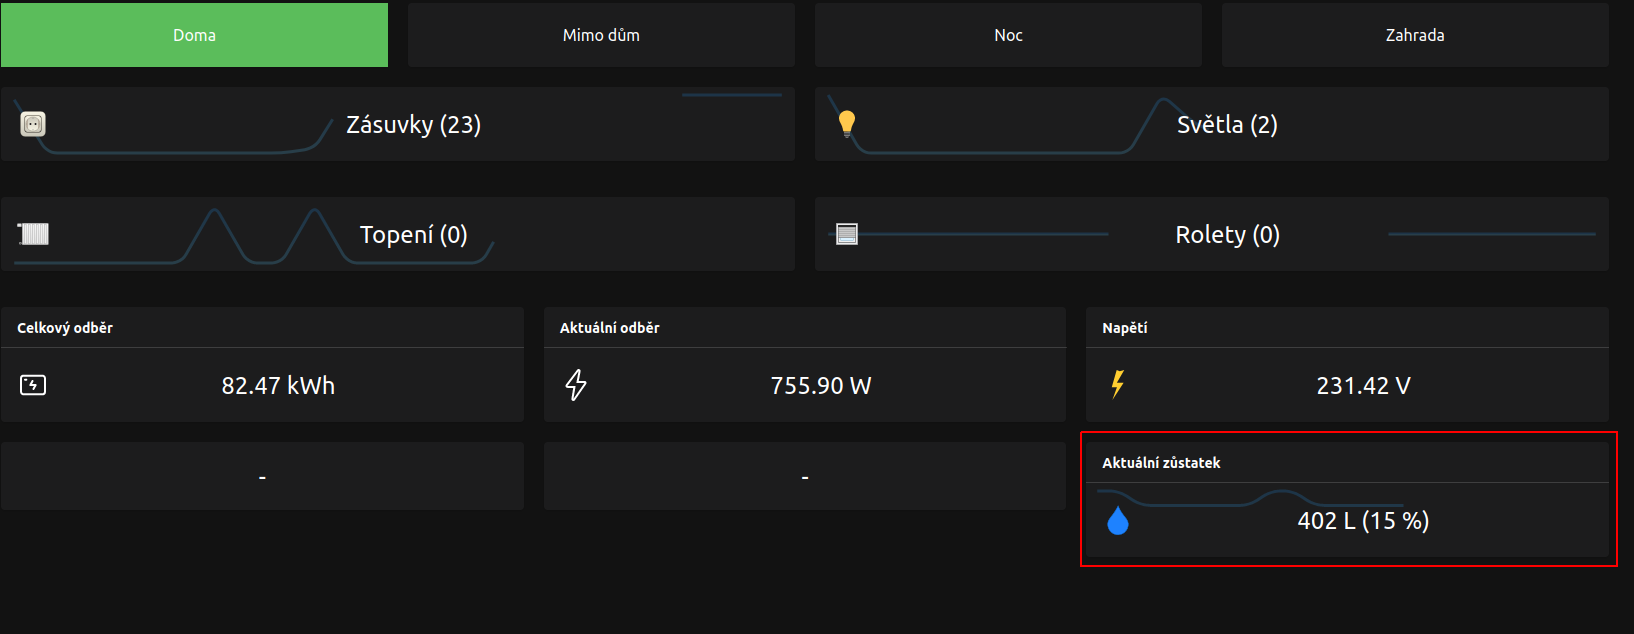
Then create Item from the Channel. If you have an item, let's show the number of litres in reservoir on our Overview page.
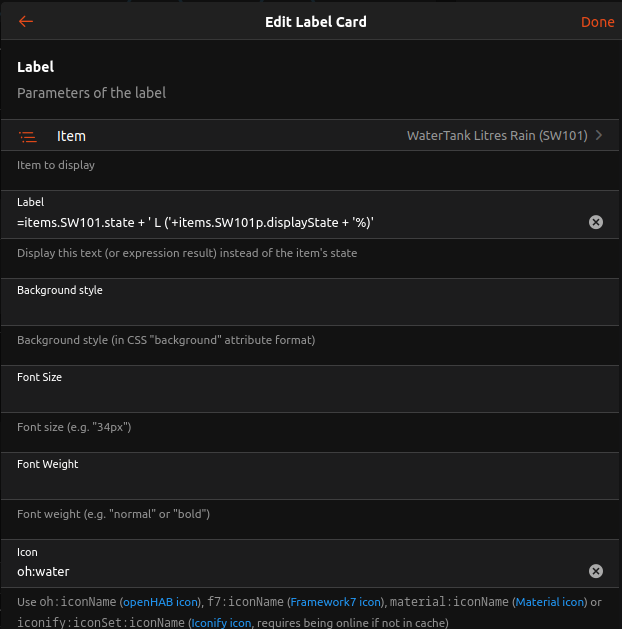

PS: If you looking for value SW101p - it is a percentage of total volume. How to get? Simply add empty number type item "SW101p" and add Rule which calculate the percentage. Current value divided by one percent (for me, 2700 litres / 100 = 27) See rule below:
configuration: {}
triggers:
- id: "1"
configuration:
itemName: SW101
state: ""
previousState: ""
type: core.ItemStateChangeTrigger
conditions: []
actions:
- inputs: {}
id: "2"
configuration:
type: application/vnd.openhab.dsl.rule
script: "
\ sendCommand(SW101p, (SW101.state as Number)/27)
\ "
type: script.ScriptAction
What else?
You can add more rules for your home automation e.g.:
- if below 300, add water from water pipe
- if more than 2,500, pump into the next tank
- if less than 1,000, do not use for irrigation etc.
Add new comment