

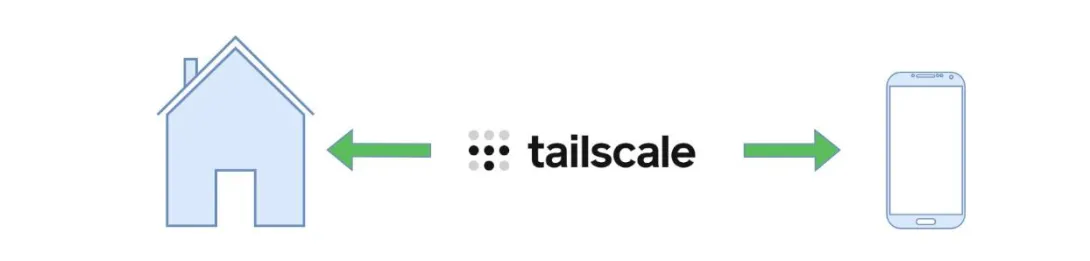
Služba Tailscale řeší přístup mezi jednotlivými zařízeními, pokud nemáte možnost veřejné IP adresy. Ne vždy je možné ji mít resp. u části internetových providerů je také dost drahá. Pro jednoho uživatele je Tailscale služba zdarma s podporou max 100 zařízení. (Přidáte tam klidně i telefon manželky nebo dětí když je potřeba) Ukážeme si jak Tailscale nainstalovat na Raspberry Pi, které budeme mít někde doma a do klienta (Android, iPhone) ze kterého budeme chtít přistupovat k domácímu Raspberry Pi. Náším příkladem bude vzdálený přístup k OpenHAB běžícím na Raspberry Pi. Nicméně stejné nastavení platí pro spoustu jiných aplikací - domácí NAS, PiHole, Home Assistant, Domoticz, NextCloud a jiné.
Hardware
Raspberry Pi 5 nebo starší
Software
Tailscale
Internetové připojení bez veřejné IPv4 adresy (pokud máte veřejnou adresu, je elegantnější WireGuard)
Úvodem
Tailscale je komerční služba, v základu pro jednoho uživatele bez nákladů, pouze je nutná registrace. Staví na populárním WireGuard protokolu, ale doplňuje jej o další části - veřejné servery a centrální registrační rozhraní pro přidělování IP adres. Po založení účtu si zaregistrujete klienta (např. Android, iPhone nebo notebook) a v našem případě Raspberry Pi kde běží naše chytrá domácnost. Tailscale aplikace pak vytvoří WireGuard tunel kde budou bezpečně a šifrovaně komunikovat zaregistrovaná zařízení.
Pozor např. zneužitím jména/hesla je možné dostat zde další zařízení a mít tak přístup. Je to tedy méně bezpečná varianta než samotný WireGuard, který jsme rozjížděli na MikroTiku, už jen tím že u Tailscale používame servery třetí strany.
Jak na to
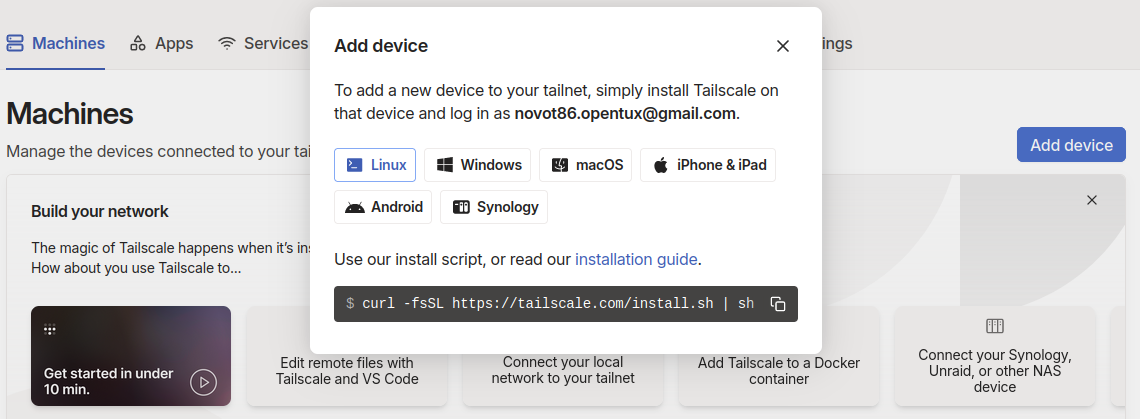
Nejdříve si zaregistrujte účet na Tailscale. Bohužel je možná autentifikace jenom pomocí jiných služeb (Google, Microsoft, Apple,..)
Pod Add device najdete odkazy pro různé klienty. Můžete zde lehce najít apku pro Android, iPhone nebo odkaz na stažení klienta pro Windows.
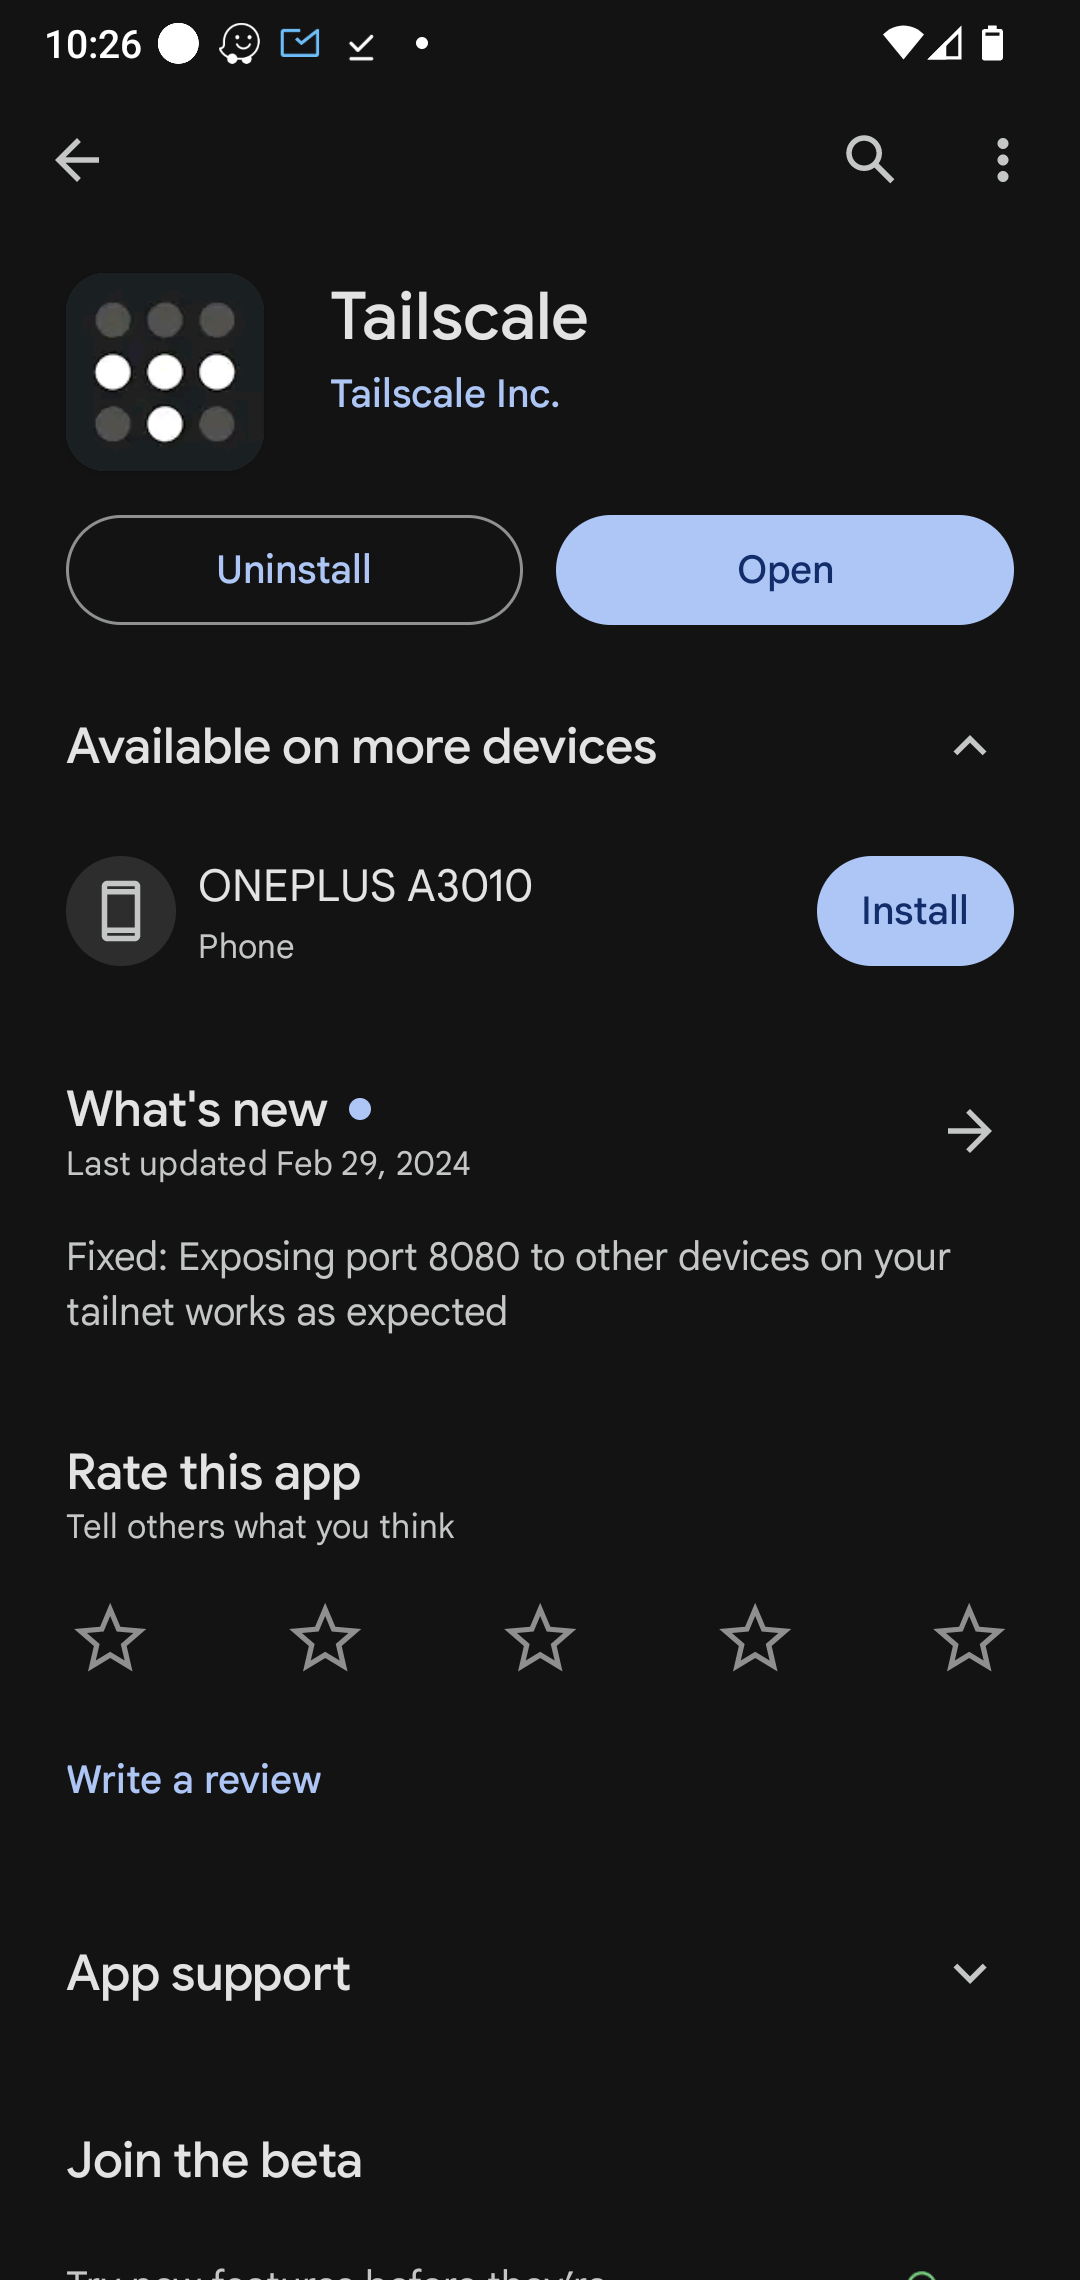
V našem případě jsme vybrali Android aplikaci. Stáhněte si aplikaci, otevřete a zadejte účet, který jste zadali při registraci. Jakmile se přihlásite, Váš telefon se přidá automaticky do seznamu "Devices".

Supr. Teď pojďme na naše Raspberry Pi. Připojte se přes SSH. Pokud nevíta jak viz náš tutoriál.
ssh openhabian@vaseipadresa
Doinstalujeme potřebný plugin:
sudo apt-get install apt-transport-https
Přidáme repozitář:
curl -fsSL https://pkgs.tailscale.com/stable/debian/bookworm.noarmor.gpg | sudo tee /usr/share/keyrings/tailscale-archive-keyring.gpg >/dev/null
curl -fsSL https://pkgs.tailscale.com/stable/debian/bookworm.tailscale-keyring.list | sudo tee /etc/apt/sources.list.d/tailscale.list
Pozn. toto je repozitář pro Debian Bookworm (Raspberry Pi 5), pokud máte jiné RPi nebo verzi OS podívejte se sem pro správný repozitář:
sudo apt-get update
sudo apt-get install tailscale
a finálně:
sudo tailscale up
Zkopírujte odkaz do prohlížeče a přihlaste se. Po přihlášení se objeví Success a Raspberry Pi se přidá do seznamu zařízení.
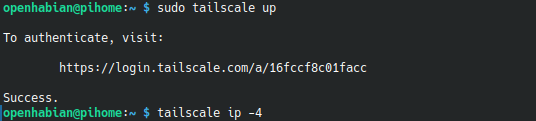
Pomocí tailcale ip - 4 lze zobrazit adresu vašeho RPi v Tailscale.
To je vše!
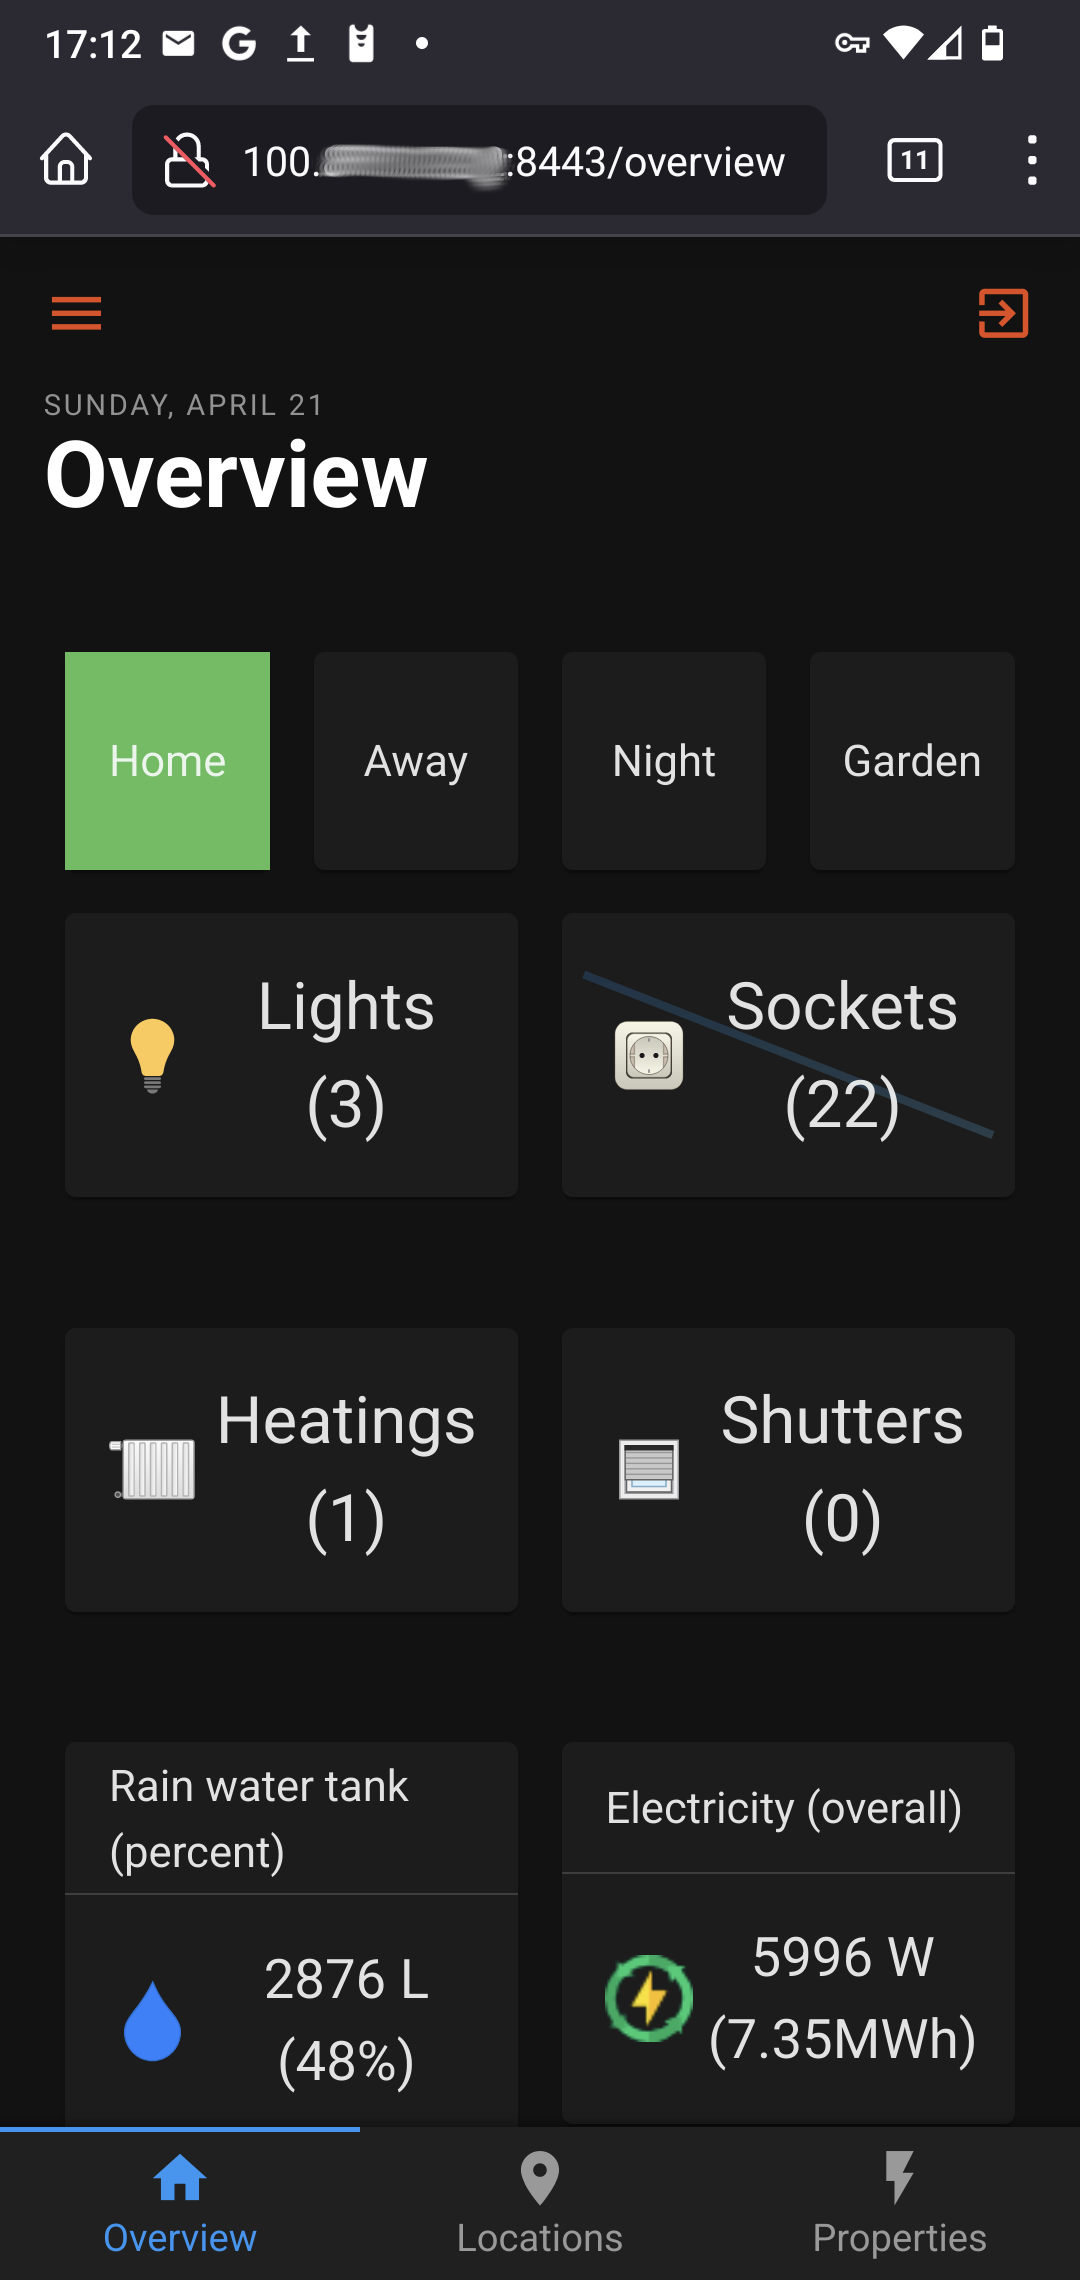
Nyní přejděte na váš mobilní telefón do aplikace Tailscale, aktivujte připojení a pak do prohlížeče zadejte přidělenou adresu vašemu Raspberry Pi v Tailscale a potřebný port dle aplikace. V našem případě (OpenHAB) to bude port 8080 pro http:// nebo 8443 pro https://
Tip:
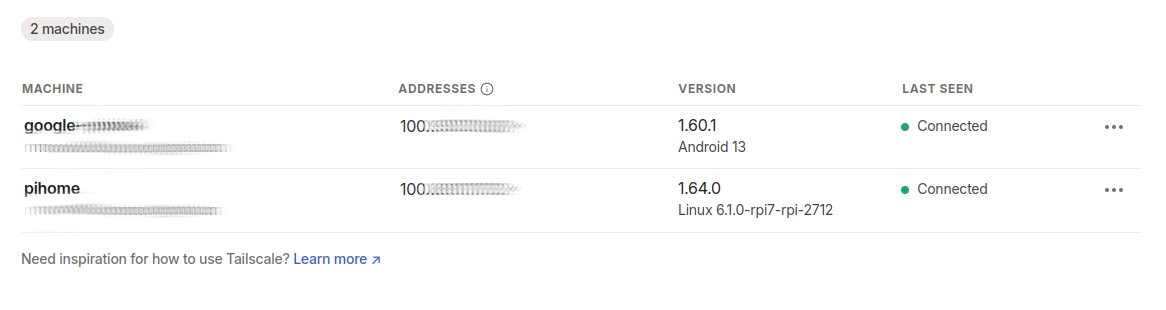
Po přihlášení na web Tailscale máte přehled o propojených zařízeních.
Přidat komentář